
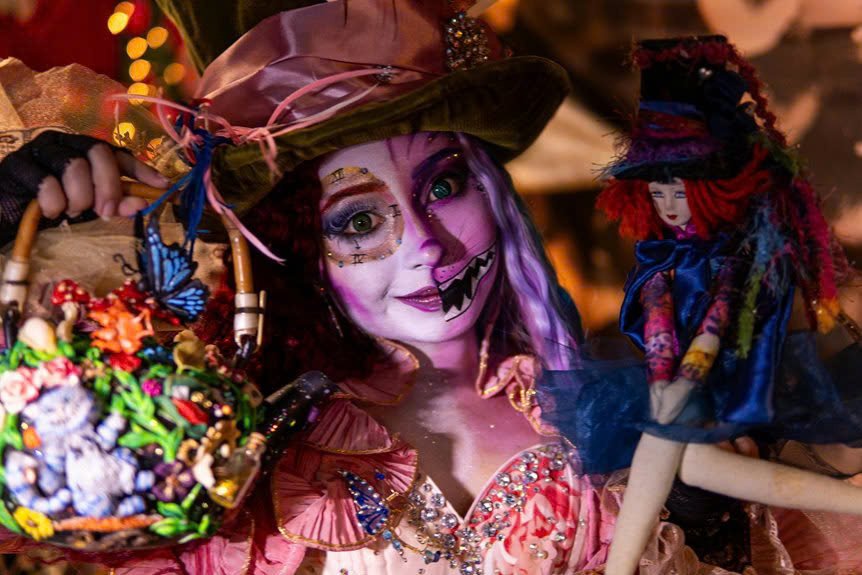
I’ve figured out that throwing an Alice in Wonderland party at home is actually pretty doable without spending a lot of money or hunting down specialty shops. The key is using stuff you already have around the house and letting your creativity do the work. Here’s what I’ve learned works really well.
Layer old book pages into garlands by cutting them into strips about 1 inch wide and 4 inches long, then tape or glue them together in chains.
Fold playing cards into simple tent-style place cards by creasing them down the middle and writing your guests’ names on the sides.
Stack vintage teacups into centerpieces by placing saucers on top of each other and balancing cups on the rim—you can use 3 to 5 cups per stack depending on your table size.
String decorative keys onto ribbon by tying small knots between each key so they don’t slide around.
Cut mushroom shapes from cardboard using a simple template—make them about 6 to 8 inches tall with a rounded cap.
Craft Mad Hatter fascinators from felt and ribbon by cutting a circle of felt about 5 inches across, rolling ribbon around the edges, and attaching it to a headband or clip.
Tea-stain your paper garlands by brewing a cup of strong black tea, letting it cool, then lightly dabbing the pages with a sponge or brush. This gives everything that aged, worn-in look without much effort.
These projects take about an afternoon total and cost almost nothing when you’re working with items you’ve got sitting around.
Create Layered Paper Garlands With Vintage Book Pages
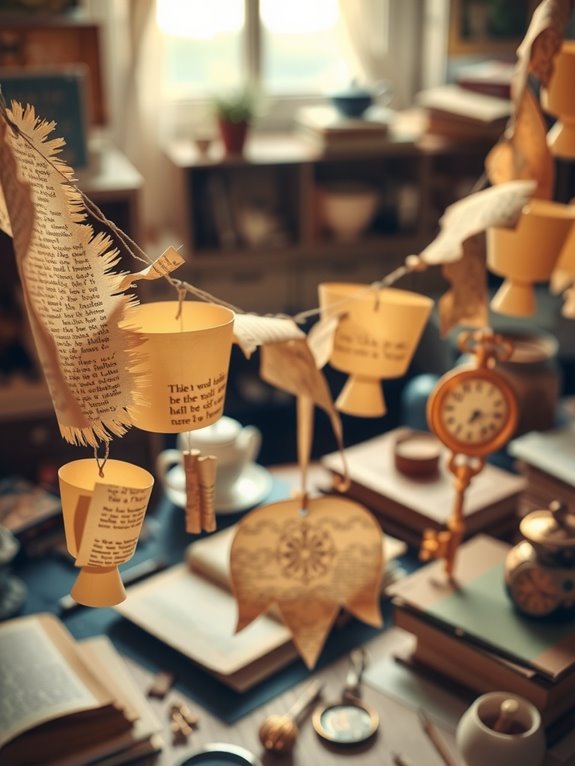
I’ve been making layered paper garlands from old book pages, and they really do add that vintage, whimsical feel to an Alice in Wonderland party. The basic idea is simple: you cut pages into shapes, stack them, and string them together. The result is a handmade decoration that feels authentically nostalgic.
Here’s what you’ll do. Cut your book pages into circles about 2 to 3 inches across, or try pennants and butterfly shapes if you want variety. Look for pages with interesting typography and faint illustrations—these details give the garland real visual depth. Once you’ve cut your shapes, stack two or three layers together and punch a hole near the top of each piece, then thread them onto a string with about half an inch of space between each shape.
The aged effect comes from distressing the edges. I use strong tea to stain the paper, letting it soak for a few minutes, then letting it dry completely. This gives that tea-stained, aged-Wonderland look without feeling forced. You can also vary the colors and sizes of your shapes as you string them—mixing pale pages with darker ones keeps things visually interesting.
Hang your garlands on walls, behind photo backdrops, or along a display table. A light coat of matte spray sealer protects the paper from dust and moisture, which helps them last longer. These pieces are worth keeping around.
Craft Whimsical Place Cards With Playing Card and Key Details
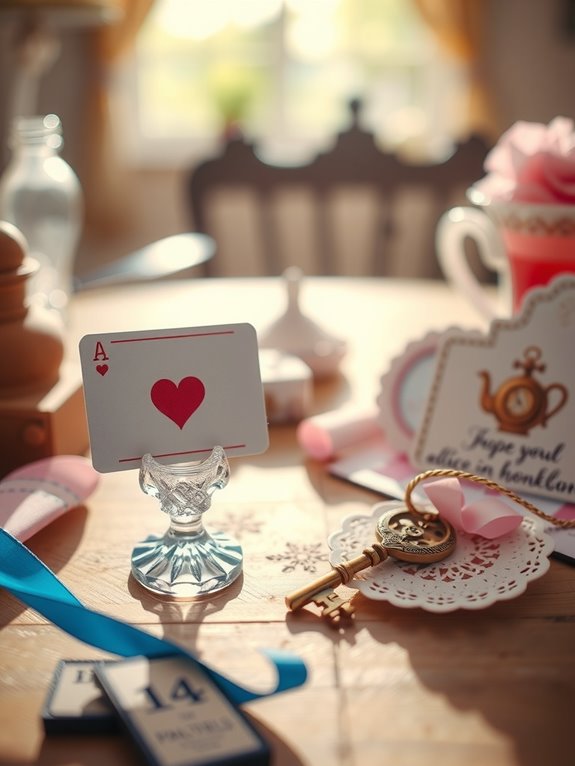
Now that your garlands are up, it’s time to figure out where everyone sits. I’ve found that folding hollow playing cards into little tent shapes gives you a perfect base for guest names, and when you tie a small decorative key charm to each one with ribbon, it becomes something your guests will actually notice and appreciate.
I usually grab my supplies from Michaels and Dollar General, then personalize each card with washi tape or add names in calligraphy. The key charm stays in place with just a thin ribbon looped through the card’s fold. These place cards pair really well with teacup centerpieces along your lace table runner, so the whole Alice in Wonderland feeling stays consistent from one end of the table to the other.
If you want to go a step further, you can stamp a small White Rabbit silhouette on the back of each card. It’s a detail most people won’t expect, and it shows that you cared enough to think about every single seat at your table.
Build Tea Party Centerpieces From Vintage Teacups and Teapots
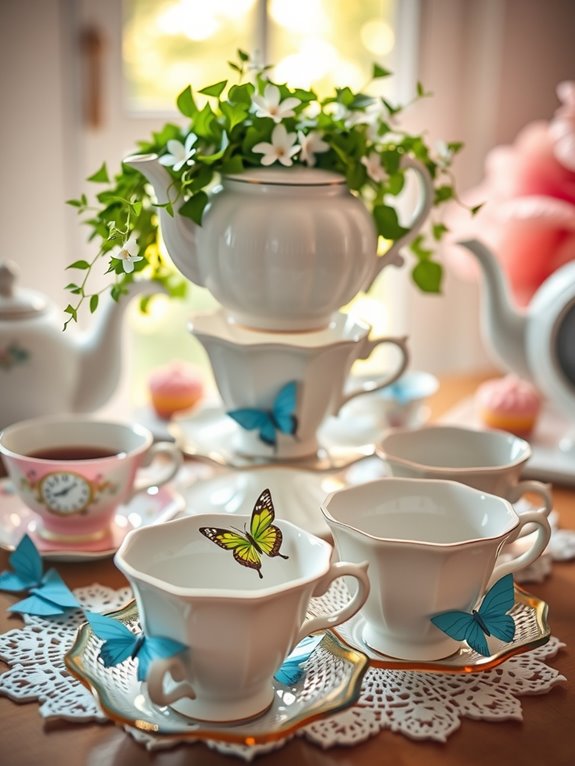
I’ve found that vintage teacups and teapots are the real stars of an Alice in Wonderland tea party table. When you repurpose pieces you already have or find at thrift stores, you create centerpieces that feel personal and genuinely whimsical instead of trying too hard.
Here’s what I do: stack teacups at different heights, mixing them with matching saucers and small plates to build visual interest across the table. You can also wrap individual cups as party favors—when you factor in decorative touches like folded rose napkins, each wrapped cup runs about $4. The key is using one vintage set and repeating it throughout, which means you spend less money while creating a coordinated look.
Arrange everything with intention. Set out tea and scones next to your stacked cups, keeping your china consistent throughout. You can create tiered arrangements just by stacking cups on saucers and building up from there. Your guests will notice the care you put into pairing everything together, and that personal touch matters more than any fancy store-bought decoration.
Stack Vintage China Into Tiered Serving Stands
I started collecting mismatched vintage plates at Goodwill and realized I could stack them into tiered serving stands for my Alice in Wonderland party. The key was figuring out how to make thrift store finds look intentional instead of random. Here’s what actually worked.
The trick is using teacups as risers between each plate layer. I’d place a plate down, set two or three teacups on top of it, then stack another plate on those cups. This creates natural height differences across three or four levels without looking forced. I secure everything with food-safe adhesive dots or small decorative plate stands sold at craft stores to keep the whole thing stable while guests grab food.
These stands let you use your display space more efficiently. Instead of spreading treats across one flat surface, you arrange small plates, teacups, and decorative items at different heights. A single stand holds maybe 12 to 15 small desserts or tea sandwiches across all its tiers, which means you need less table space overall.
The real savings comes from reusing the same vintage pieces for multiple centerpieces throughout your event. I’d build four or five stands total, each one using different combinations of plates and cups from the same collection. By rotating which pieces go where, you stretch a modest thrift store budget across your whole party.
What started as random secondhand dishes becomes something that looks like you planned it all along. You’re creating displays from pieces that would’ve ended up in a donation pile.
Arrange Floating Teacup Centerpieces With Suspended Saucers
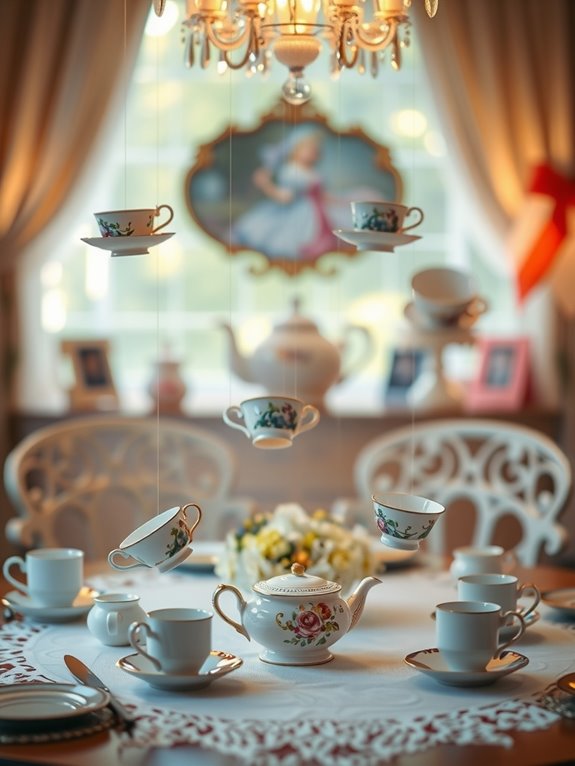
What makes guests actually stop and stare at your table? A floating teacup centerpiece does exactly that. I’ve discovered that pairing a vintage teacup with a suspended saucer using clear fishing line creates something really special.
I anchor the saucer to a ceiling hook with lightweight fishing line, then suspend the teacup above it. Before finalizing, I place a small weight inside the cup—usually about 2-3 ounces—and adjust the line length until everything stays perfectly level and aligned. You’ll find beautiful mismatched sets at thrift stores, and mixing patterns gives your table authentic charm without feeling too matchy or formal.
The setup takes maybe 10-15 minutes per centerpiece once you get the hang of it. I add a folded rose napkin and delicate flowers around the base to keep that whimsical tea party feeling. Your guests genuinely won’t believe how you pulled this off.
Paint Wonderland Characters on Wine Glasses
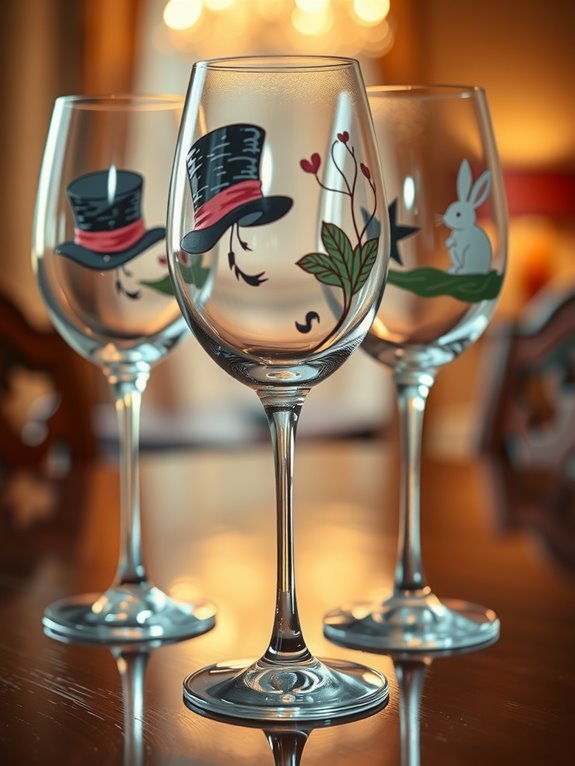
I started painting wine glasses after realizing my guests actually wanted to take home something useful from my themed dinner parties. Hand-painted Wonderland characters turn regular glassware into personalized keepsakes that people will actually use.
You can paint the White Rabbit, Mad Hatter, Queen of Hearts, or Alice onto the bowl of each glass using step-by-step tutorials that work for beginners and experienced painters alike. I use acrylic paint mixed with a glass medium—about 2 parts paint to 1 part medium—which keeps the colors from flaking off during washing. The brushes I reach for are thin rounds and liners, usually size 0 or 00, so I can get crisp details on the characters’ faces and clothing.
Start by washing and drying your glasses completely, then lightly sketch your character in pencil so you can erase mistakes before painting. Work from light colors to dark ones, letting each layer dry for about 15 minutes before adding details on top. Once everything’s dry, seal the painted design with a clear acrylic sealer spray—two light coats work better than one thick coat.
I arrange butterfly place cards on the rims to tie everything back to the Wonderland theme. When you set these glasses alongside your vintage china, the whole table feels like it belongs together in one cohesive world. Your guests notice these kinds of details, and it makes them feel like they’re genuinely welcomed at your table.
Make Mad Hatter and Teacup Fascinators for Guests
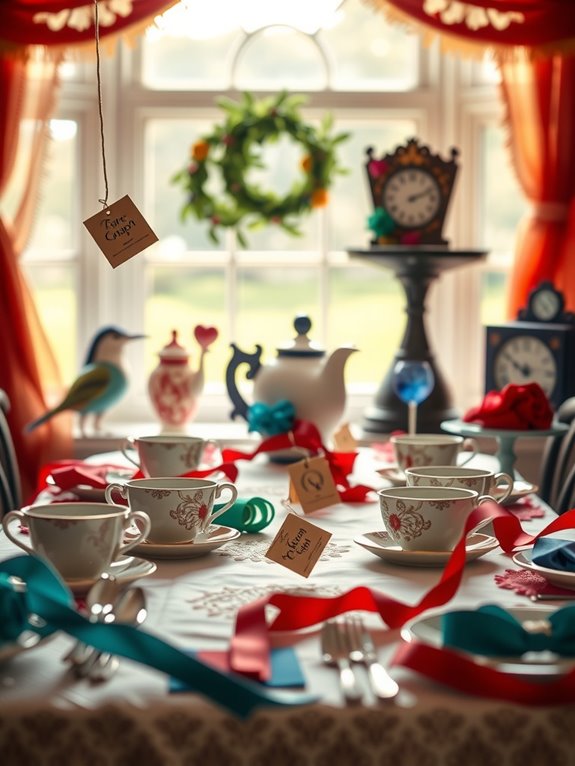
I got tired of watching guests wear the same old paper crowns to tea parties, so I started making fascinators inspired by Alice in Wonderland instead. These lightweight headpieces work for any guest—they’re detailed enough to look great in photos but comfortable enough to wear all day. You end up with wearable art that actually fits your party theme.
The Mad Hatter fascinator is my go-to design. I start with a 1-inch-wide black velvet headband as the base, then cut felt pieces (I use a 4-inch circle for the hat crown) and layer them with 2 to 3 ribbon strips in contrasting colors like deep purple and gold. Vintage brooches pinned at the center add that authentic charm without looking costume-y. The whole thing sits balanced on top of your head rather than tilted to one side, which keeps it stable through an entire party.
The Teacup fascinator pairs perfectly with a tea party tablescape. I craft a small teacup shape from stiffened fabric and attach it to the same headband base, then tuck in fabric flowers or small leaves around the rim. This design works especially well if your other decorations feature teacup patterns or floral arrangements.
Both designs come together in about 45 minutes once you gather your materials. Start with the headband, layer your fabric pieces using a hot glue gun, and finish by securing embellishments like brooches or beads. For New Year’s parties, I swap regular felt and ribbon for glittery versions in silver or champagne tones, which catches light beautifully without changing the construction process.
String Decorative Keys Into Garlands With Ribbon
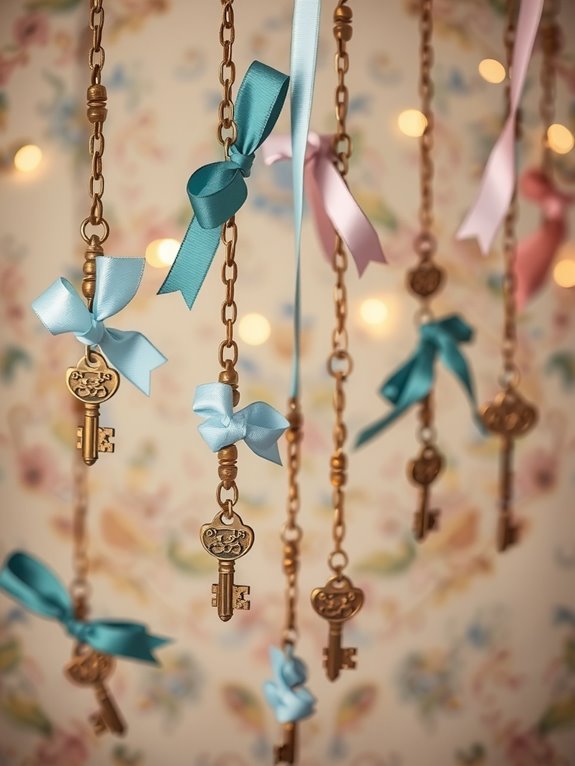
I found this simple project while looking for ways to add Victorian details to an Alice in Wonderland party setup. Stringing decorative keys onto ribbon creates that whimsical vintage feeling the theme needs.
I picked up three different key styles from Michaels—some with bright brass finishes, others with darker patina—and threaded them onto a 1-inch-wide satin ribbon. Each key sits about 3 inches apart, which gives them room to show off their individual character without looking crowded. Threading them is straightforward: I used a needle with an eye wide enough for the ribbon and simply pushed it through the key loop, then moved to the next one.
The real strength of these garlands is how they work in multiple ways. You can drape them across a table, hang them vertically between other decorations, or wrap them around wrapped favors as a closure accent. Because the keys are metallic, they catch light and create focal points that tie together teacups, teapots, lace, and flowers—those random elements suddenly feel connected and intentional.
Guests notice these details. The vintage look pairs naturally with the Wonderland theme, and people appreciate when they see you’ve thought about small touches like this.
Cut Mushroom and Clock Shapes From Cardboard for Wall Art
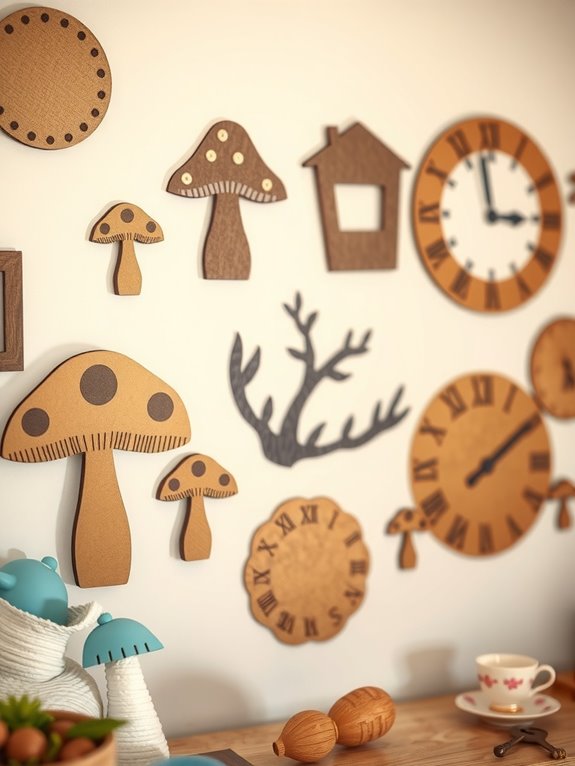
I’ve been making these mushroom and clock wall pieces from cardboard, and they’re honestly fun to put together. The whole project comes down to cutting shapes carefully and painting them with details that feel a little whimsical.
I use sturdy corrugated cardboard from shipping boxes because it holds up well and doesn’t cost anything if you’ve got boxes lying around. I sketch my designs with a regular pencil first, then cut them out using a craft knife and a ruler to keep the lines straight. Taking time with this step makes a real difference in how clean the final pieces look.
For painting, I go with bright red acrylic paint for the mushroom caps and add white polka dots once that base coat dries. The clock faces get black numbers and hands painted on with a thin brush. These details are what make the pieces feel intentional rather than just random cardboard shapes on your wall.
Once everything’s dry, I have two options for hanging them. I can mount them flat directly on the wall using adhesive strips or small nails, kind of like a gallery setup. Or I drill small holes near the top of each piece and hang them with twine as a mobile, which lets them move a little and gives them more dimension in the space.
Cardboard Source and Preparation
I like to start with sturdy cardboard from appliance boxes or shipping materials because thicker cardboard holds its shape better and won’t warp once you hang your Wonderland art on the wall. The kind of boxes that electronics and refrigerators come in work particularly well.
Before you do anything else, flatten and smooth your cardboard sheets. I sand the rough edges lightly so they’re safer to handle, then store the flat pieces so they don’t bend out of shape. You can test how thick your cardboard is by attempting a fold—if it bends too easily, look for something sturdier.
Once I’ve got my materials ready, I sketch my mushroom and clock designs directly onto the cardboard. This lets me customize the sizes and proportions to fit my wall space. Planning ahead like this prevents wasted materials and makes the cutting phase much smoother when I actually get started.
Painting and Wall Installation
Okay, so you’ve got your cardboard shapes cut out and ready. Now comes the part where you actually make them look like something worth hanging on your wall.
I start with acrylic paint—just regular craft acrylics from any art supply store. For the mushrooms, I add polka dots using a thin brush or even a cotton swab dipped in paint. The clock shapes get stripes and tiny clock hands pointing toward 3 o’clock or wherever feels right. These details are what make the whole thing feel intentional instead of just cardboard cutouts.
Once the paint is completely dry—and I mean actually dry, not just surface-dry—I seal everything with clear varnish or mod podge. A thin coat does the job. This protective layer keeps the paint from chipping when you touch it or dust it later. Let that dry for a few hours before you move anything around.
For mounting, removable adhesive strips work really well. I use the kind made for wall damage-free hanging, the ones that hold up to 5 pounds. Arrange your shapes near where you’re setting up your tea party. Add teacups, playing cards, and a few coordinating clocks around them. That’s when the whole Alice in Wonderland feel actually starts to come together on your wall.
Design a Muted Pastel Photo Backdrop With Lace and Botanicals
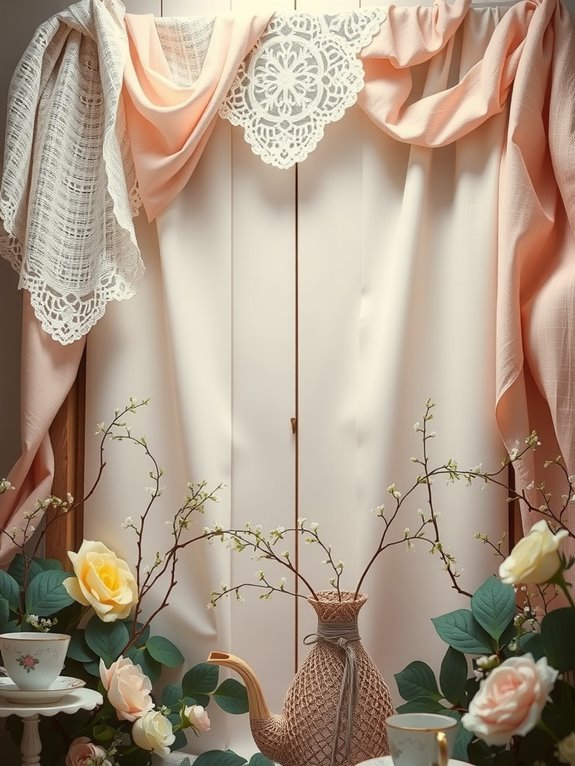
Creating a dreamy photo backdrop doesn’t require professional equipment or a huge budget—just some fabric, flowers, and a little patience. I wanted something that felt soft and whimsical, so I layered soft pinks, lavender, and pale mint fabrics with sheer lace to build my pastel backdrop. The transparency of the lace creates that ethereal, Wonderland feeling I was after.
Creating a dreamy backdrop requires just fabric, flowers, and patience—layer soft pastels with sheer lace for an ethereal, whimsical feel.
I start by gathering my materials. Dried eucalyptus branches and baby’s breath give delicate texture without taking up much space. I scatter pressed pastel flowers throughout the design—nothing too dense, just enough to catch the light. Behind the fabrics, I position warm white string lights about 6 inches back to create soft glowing shadows without blowing out the photos.
For structure and visual interest, I drape lace banners strategically across the backdrop. This creates gentle shadows and breaks up the solid fabric layers. Small vintage teacups and paper butterflies sit at the base as subtle accents that don’t demand attention.
I mount everything on lightweight foam core, which keeps the whole thing portable and prevents sagging. The spacing of elements matters more than the quantity. When I space things generously—leaving at least 4-6 inches between clusters—the photos feel airy and dreamy rather than cluttered. Your subject stays in focus, and the backdrop supports rather than competes with whoever’s being photographed.