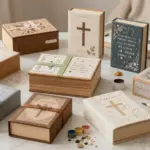
Are you tired of looking at dull plastic storage boxes cluttering your space? I get it. We’ve all been there, wishing for a way to make those inexpensive containers not just functional, but also visually appealing. That’s why I created this guide on plastic box painting ideas. It’s time to take those bland boxes and give them a fresh coat of creativity.
If you’re a fan of DIY projects or someone who enjoys crafting unique home decor, this post is made for you. Whether you’re looking to organize your craft supplies or simply want to add a pop of personality to your home, you’ll find inspiration here. The best part? You’ll discover practical, easy-to-follow ideas that won’t break the bank.
You can expect to find 10 creative painting techniques that will not only enhance your storage but also provide a fun outlet for your artistic side. Each idea is designed to be budget-friendly and achievable, ensuring that you can revamp your space without spending a fortune. Let’s dive into some eye-catching ways to transform your plastic boxes from ordinary to extraordinary!
Key Takeaways
– Discover 10 unique painting techniques to upgrade your plastic storage boxes and personalize your space.
– Learn how to implement budget-friendly home decor ideas that make organizing fun and stylish.
– Find practical DIY storage solutions perfect for craft supplies or general home organization.
– Get tips on using simple materials to create stunning designs, making your projects accessible and easy to replicate.
– Explore how upcycling plastic projects can contribute to a more sustainable lifestyle while enhancing your home decor.
1. Chic Ombre Effect

Looking to upgrade your storage with a stylish touch? The chic ombre effect transforms plain plastic boxes into eye-catching decor. By blending two or three colors, you can create a beautiful gradient that adds depth to any room. This technique is perfect for larger boxes that store blankets or toys, merging functionality with aesthetics effortlessly.
To create your ombre look, start by picking colors that complement your home. Paint the bottom of the box with the darkest shade and gradually blend in lighter hues using a sponge for a smooth transition. This method not only enhances visual appeal but also keeps your space organized.
Key steps to get started:
– Select 2-3 colors that work well together
– Use acrylic paint for durability and ease
– Finish with a clear sealant for protection
With minimal effort, you can turn ordinary storage into stylish statement pieces that brighten your space!


Last update on 2026-03-02 / Affiliate links / Images from Amazon Product Advertising API
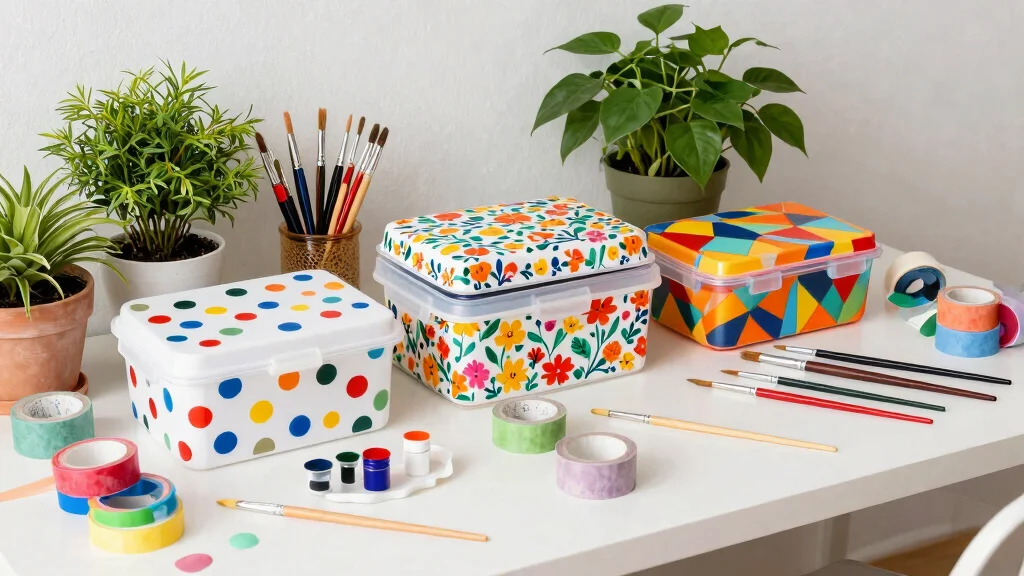
2. Whimsical Animal Patterns

Why not inject some fun into your storage with whimsical animal patterns? These charming designs are perfect for children’s rooms or craft areas, bringing smiles to everyone’s faces. By choosing your favorite animals and using bold colors, you can create delightful storage solutions that are both cute and functional.
For this project, either use stencils or freehand your animal designs with a fine brush. Bright, vibrant colors will make these boxes pop, while personalizing them with names adds an extra touch. This activity is not only enjoyable but also a great way to bond with family while tackling organization.
Helpful tips to consider:
– Use painter’s tape for clean edges
– Add fun facts or quotes to enhance the designs
You’ll not only beautify your space but also make it uniquely yours!
Turn plain plastic boxes into playful storage and upgrade cheap storage with whimsical animal patterns and easy plastic box painting ideas. Choose 2–3 bold colors and a simple stencil or freehand design to create a cohesive, child-friendly system. It’s quick, practical, and totally share-worthy for any DIY & crafts setup.
| # | Preview | Product | Price | |
|---|---|---|---|---|
| 1 |

|
56pcs Baby Shower Stencils for Painting – 3 Inch Reusable Cute Animal & Onesie Patterns – Ideal... | $8.99 | Buy on Amazon |
Last update on 2026-02-27 / Affiliate links / Images from Amazon Product Advertising API
3. Vintage Floral Prints

Embrace the charm of nature with vintage floral prints on your plastic boxes. This elegant design is perfect for those who adore a soft, feminine touch in their home. By painting delicate floral patterns, you can add a touch of beauty to everyday organization.
Start by selecting floral stencils or freehanding your favorite blooms with pastel colors for that vintage appeal. Use a fine brush to capture the intricate details of each flower. This charming design works wonderfully in bedrooms or craft rooms, making storage not just practical but also visually pleasing.
Tips for your floral project:
– Experiment with various flower types for diversity
– Layer colors to add depth and dimension
Enjoy creating a bit of DIY elegance that brightens your space!


Last update on 2026-02-27 / Affiliate links / Images from Amazon Product Advertising API
4. Geometric Bliss

Geometric designs are becoming increasingly popular and are surprisingly easy to create on plastic boxes! This modern aesthetic is ideal for minimalists or those looking for a contemporary flair. Choose bold colors, like black and white, or a mix of neutrals with bright accents for a striking look.
Use painter’s tape to outline sharp shapes such as triangles or stripes, and fill them in with your chosen colors. Once dry, remove the tape carefully to reveal clean lines. These boxes are perfect for organizing anything from office supplies to toys while adding a chic element to your decor.
Here’s how to get started:
– Opt for contrasting colors for maximum impact
– Ensure paint is dry before removing tape to avoid smudging
This stylish approach will give your storage a fresh, modern twist!
When I framed my shelves with geometric shapes, my plastic boxes suddenly felt chic — Geometric Bliss — without breaking the bank. Use painter’s tape to outline triangles or stripes, then fill with bold colors. It’s fast, fun, and totally upgrades your storage.


Last update on 2026-02-27 / Affiliate links / Images from Amazon Product Advertising API
5. Mosaic Magic

Add a colorful twist to your storage with a stunning mosaic design! This fun technique uses small pieces of scrap paper or paint to create a textured, eye-catching effect on your plastic boxes.
Begin by cutting colorful paper into tiny squares or using vibrant paint drops to form a mosaic pattern. Adhere them using Mod Podge for a glossy finish. This playful design is perfect for storing craft supplies or magazines, and it can also serve as striking decor throughout your home.
Key tips to consider:
– Use various materials like fabric or washi tape for added variety
– Seal with Mod Podge for a cohesive finish
Let your creativity shine with this vibrant project!


Last update on 2026-02-27 / Affiliate links / Images from Amazon Product Advertising API
6. Chalkboard Finish

Channel your creativity with a chalkboard finish on your plastic boxes. This stylish option not only looks great but also allows for easy labeling and re-labeling as needed!
Start by painting the entire box with chalkboard paint. Once dry, use chalk or chalk markers to write labels or doodles. This versatile solution is especially practical in kitchens or offices, making organization a breeze. Plus, the matte finish lends a contemporary feel to your storage.
Tips for success:
– Ensure the paint is fully dry before writing
– Use different chalk colors for seasonal updates
This fun idea merges creativity with functionality, making your space more inviting!


Last update on 2026-02-27 / Affiliate links / Images from Amazon Product Advertising API
7. Color Block Strategy

Color blocking is a trendy way to refresh your plastic boxes with a bold look! This method divides the box into sections of vibrant colors, creating a visually striking effect.
Choose two or three colors that complement each other and use painter’s tape to create clean lines. Apply the paint in blocks and let it dry completely before removing the tape. This approach works wonders in playrooms or offices, providing lively storage that stands out in any decor style.
Essential tips:
– Match colors to your room’s palette for harmony
– Opt for a satin or glossy finish for an extra touch of charm
Enjoy a modern, creative way to upgrade your storage solutions!


Last update on 2026-02-27 / Affiliate links / Images from Amazon Product Advertising API
8. Stenciled Quotes

Inspire yourself daily with stenciled quotes on your plastic boxes! This personal touch not only beautifies your storage but also motivates you whenever you reach for your items.
Choose quotes that resonate with you and select a font that aligns with your decor style. Using stencils, carefully paint the quotes onto the boxes in contrasting colors. This idea is perfect for organizing office supplies or children’s toys, adding personality to your storage solutions.
Helpful hints:
– Use a small brush for detailed lettering
– Change quotes seasonally for a fresh feel
Personalizing your space while staying organized has never been this enjoyable!
Transform everyday storage into motivation with stenciled quotes on plastic boxes. Pick quotes that boost your day, pair a bold font with contrasting paint, and stencil carefully for clean lines. A simple DIY from plastic box painting ideas turns chaos into organized inspiration.


Last update on 2026-02-27 / Affiliate links / Images from Amazon Product Advertising API
How To Choose the Right Plastic Boxes for Painting
When you’re ready to transform ordinary plastic boxes into beautiful storage solutions, choosing the right type is key. Here are some tips to help you select the perfect plastic boxes that suit your painting ideas and storage needs.
1. Size Matters
Consider what you plan to store in your plastic boxes. If you want to organize small craft supplies, go for smaller boxes. For larger items like blankets or books, choose big, sturdy containers. Knowing the size will help you determine how many boxes you’ll need and how much space they will occupy.
2. Material Quality
Look for plastic boxes made from high-quality, durable materials. Polypropylene is a great choice as it’s strong and resistant to wear. Cheaper plastics may warp or break after painting. Check if the box is BPA-free if you plan to store food items. A sturdy box ensures that your painted designs last longer and maintain their beauty.
3. Clear vs. Opaque
Decide if you want clear or opaque boxes. Clear boxes allow you to easily see the contents, which is great for quick access. Opaque boxes offer a cleaner look and can hide clutter. If you paint the outside, opaque boxes can be a fun canvas for your creativity.
4. Lid Options
Think about how you want to access your items. Boxes with snap-on lids keep items secure and prevent dust from settling inside. If you prefer easy access, consider boxes with hinged lids or no lids at all. This choice affects how you decorate too—some lids may need a different approach in painting.
5. Stackability
If you need to save space, choose stackable plastic boxes. They allow you to make the most of vertical space in your home. Check the design of the box to ensure they fit neatly on top of each other without wobbling. This feature also makes it easier to paint different boxes while keeping your workspace tidy.
6. Budget Considerations
Lastly, keep your budget in mind. Plastic boxes come in various price ranges. While it’s tempting to go for the cheapest option, investing a little more in higher quality can save you money in the long run. Quality boxes withstand the painting process better and serve you well for years.
Pro Tip: Before you start painting, test your chosen paint on a small area of the plastic box to ensure it adheres well and looks the way you want. This simple step can prevent any disappointments and help refine your choice of colors and techniques.
By following these tips, you can choose the perfect plastic boxes for your painting projects, turning them into stunning, functional pieces for your home. Happy crafting!
| # | Preview | Product | Price | |
|---|---|---|---|---|
| 1 |

|
Playing With Heart | $1.99 | Buy on Amazon |
Last update on 2026-02-27 / Affiliate links / Images from Amazon Product Advertising API
9. Tie-Dye Magic

Revive the fun of tie-dye with a unique twist by applying this technique to your plastic storage boxes! Vibrant colors and swirling patterns will add a playful element to your organization.
Use fabric dyes or diluted acrylic paint to create your tie-dye effect by folding or crumpling the box and applying colors at various points. No two boxes will look alike, making this an exciting option for children’s rooms or craft areas.
Essential tips:
– Experiment with different color combos for variety
– Wear gloves to keep your hands clean during the process
This method is a fantastic way to infuse creativity into your home storage!


Last update on 2026-02-27 / Affiliate links / Images from Amazon Product Advertising API
10. Mixed Media Collage

Get creative with a mixed media collage on your plastic boxes! This project allows you to combine fabric, paper, and paint to craft unique storage solutions that reflect your personality.
Start by gathering various materials, such as patterned fabric, scrapbook paper, or even postcards. Arrange and adhere them to the box with Mod Podge, layering to add depth. Once dry, seal it with another coat of Mod Podge for durability. These boxes can become stunning focal points in any room.
Tips for a successful collage:
– Mix textures by combining fabric and paper
– Use a variety of colors for an engaging design
Unleash your creativity while crafting fabulous storage solutions!
Conclusion

Revamping your plastic storage boxes doesn’t just improve organization; it adds a personal touch to your home that can reflect your personality!
With these 10 plastic box painting ideas, you’ve got endless possibilities to explore. Whether you go for a chic ombre, whimsical animal patterns, or a mixed media collage, each project is a fun way to get crafty and make your space uniquely yours. So grab your paint and start creating beautiful storage solutions that brighten your home and keep you organized!
Frequently Asked Questions
What are some beginner-friendly plastic box painting ideas to upgrade cheap storage?
These plastic box painting ideas are perfect for turning cheap storage into stylish organizers.
Here’s a simple, step-by-step approach: start by cleaning and drying the boxes, and remove labels if you can. Then prime with a plastic-specific primer so the paint adheres properly. Choose your paint: acrylic craft paint for solid colors or spray paint designed for plastic for a smooth finish. Try color-blocking, bold stripes, or light stenciling to add personality. Finish with a clear sealant like polycrylic to protect the surface. Label the boxes with durable labels to boost craft organization tips. It’s a great way to bring budget-friendly home decor into any room.
What materials and paints work best for painting plastic boxes to ensure durability?
Getting durable results on plastic starts with the right materials for DIY storage solutions. Begin with a plastic-specific primer, then choose either acrylic craft paint or spray paint designed for plastic. For a vintage or matte look, you can try chalk paint on a primed surface, but seal with a protective topcoat like polycrylic. Apply in thin coats, letting each coat dry fully, and avoid heavy layers that can peel. Clean the surface, lightly sand slick areas if needed, and finish with a clear sealant. These choices keep your boxes durable in kitchens, playrooms, and home offices as reliable DIY storage solutions.
What creative painting techniques work best on plastic boxes without peeling or chipping?
Try these techniques that look fantastic and stay put on plastic.
Color-blocking for a modern vibe; ombre for a soft gradient; and stenciling for patterns. You can also experiment with marbling or metallic accents for a luxe touch. Prep is key: lightly sand a glossy surface, wipe away dust, then apply a plastic primer and thin coats of paint. Finish with a durable sealant and let it cure fully before handling. These techniques support strong craft organization tips for busy spaces.
Can painted plastic boxes help with craft organization and DIY storage solutions in a small space?
Absolutely. Painted boxes add color and clarity to small spaces. Use craft organization tips like color coding, clear lids, and labeled sections to turn clutter into order. Stack boxes safely, use dividers, and group items by project type or season. With coordinated colors and a sturdy finish, these DIY storage solutions boost budget-friendly home decor in kitchens, kids’ rooms, and offices. Plus, these can be considered upcycled plastic projects when you reuse containers you already have.
Are there easy, budget-friendly steps to transform plain plastic boxes into attractive storage for any room?
Definitely. Here are straightforward steps to transform plain plastic boxes on a budget.
1) Gather supplies: plastic primer, your favorite paints, brushes or spray cans, and a sealant. 2) Clean and dry the boxes, remove labels, and lightly sand if needed. 3) Apply plastic box painting ideas in several thin coats, letting each dry between layers. 4) Add decorative touches like washi tape or decoupage for personality. 5) Seal and cure fully before use. 6) Label and place them where you need extra storage. This approach is ideal for upcycled plastic projects and a simple way to achieve budget-friendly home decor.
Related Topics
DIY storage solutions
plastic box painting
upcycled projects
budget-friendly decor
creative painting techniques
craft organization
easy DIY
beginner friendly
home organization
colorful storage
quick crafts
functional art