
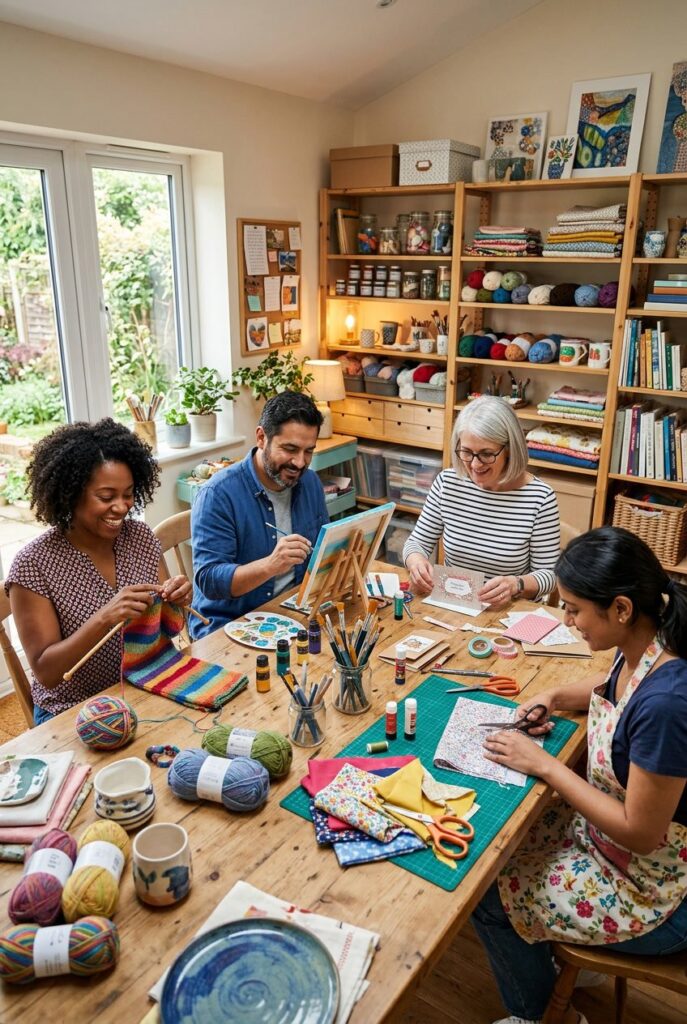
May always feels full of fresh colors and simple chances to make something you’ll actually use. Pick a project that fits your time and tools—whether you want a quick, one-hour craft or a calm, all-day build—and you’ll get a small, real win that brightens your home and mood.
You can start a May craft today that matches your skill level and gives you a useful, seasonally fresh result.
This list mixes easy, quick ideas with projects that teach a new skill, like working with fabric, concrete, or pressed flowers.
Expect options for outdoor decor, wearable pieces, and small gifts so you can craft for your space, your plants, or someone you care about.
Key Takeaways
- Choose a project that fits the time and tools you have.
- Try one seasonal idea that uses flowers, herbs, or natural materials.
- Pick a mix of quick wins and a longer project to learn a new skill.
Getting Started With May Craft Ideas for Adults

Pick a few projects that match your available time, space, and tools.
Focus on one small kit or a single-material craft first so you finish something quickly and learn core skills.

The kit's 4-inch flower press will make attractive cards, bookmarks, trinket boxes, and more.

𝐃𝐈𝐘 𝐏𝐑𝐄𝐒𝐒𝐄𝐃 𝐅𝐋𝐎𝐖𝐄𝐑 𝐂𝐑𝐀𝐅𝐓 𝐊𝐈𝐓 — 𝐂𝐑𝐄𝐀𝐓𝐄 𝐘𝐎𝐔𝐑 𝐎𝐖𝐍 𝐀𝐑𝐓 Relax and enjoy a beautiful DIY craft project by arranging real pressed flowers between two floating glass panels. Perfect for adults and women who love creative, hands-on art and want a relaxing craft experience at home.

DIY Bookmark Kit: Contains 125 pressed flowers (5 exquisite styles, 25 pieces each), 100 laminating films (1.96 x 5.9'', 12mils), 100 colorful tassels with 20 colors and 1 hole puncher. Note: This set does not include a laminator, bookmark set needs to be applied with a laminator
Essential Craft Supplies for Beginners
Start with a basic set that covers many May craft ideas for adults.
Buy a craft knife, self-healing cutting mat, scissors (fabric and paper), a hot glue gun with sticks, craft glue, Mod Podge, and a small sewing kit.
Include 3–5 brushes, acrylic paints, a palette, and a roll of painter’s tape.
Add materials that suit spring projects: assorted dried flowers, beeswax pellets, cotton cord for macramé, and a few small pots for concrete or planting projects.
Keep a few silicone molds, sandpaper, and a spray sealer on hand.
Store supplies in clear bins so you can grab what you need fast.
A modest budget goes far.
Buy quality tools once (scissors, knife, mat) and replenish consumables (glue, paints) as you use them.
Label bins for “paper,” “fabric,” and “outdoor” so you avoid clutter and lost time.
Choosing the Right DIY Projects
Match projects to time and skill.
For a single afternoon, choose pressed flower lanterns, hand-stamped garden markers, or watercolor leaf prints on fabric.
These need basic tools and give quick results.
If you want a multi-day project, try macramé plant hangers, concrete planters, or decoupage trays.
They need drying or curing time and often benefit from a small workspace or tray to keep things tidy.
Consider utility and display.
Pick projects you’ll actually use—herb-infused oils, a welcome mat, or a denim garden tote give daily value.
If you like learning a new technique, start with an easy version (sample pack, small mold) before committing to larger, costly materials.
Safety Tips and Best Practices
Work in a well-ventilated area for glues, paints, and oil infusions.
Wear gloves when handling concrete, dyes, or hot wax.
Keep a fire extinguisher or a metal lid nearby when you melt beeswax or use a hot glue gun.
Read labels on paints and solvents; choose non-toxic or low-VOC options when possible.
Keep sharp tools in a closed box and cut away from your body.
If you use power tools for heavier projects, wear eye protection and a dust mask.
Clean up spills immediately and store chemicals out of reach of children and pets.
Test finishes on scrap material before applying to your final piece to avoid surprises.
Seasonal May Craft Projects for Adults

These projects focus on seasonal materials, easy techniques, and useful finished pieces you’ll actually use.
You’ll find step-by-step ideas for bright spring decor, ways to repurpose warm fall tones, and cozy winter crafts that make great gifts.

1.Made from high quality cotton cord: this 2 pack 20 inch plant hanger indoor are sturdy, durable, and premium quality, accommodating various shapes and sizes of planters effortlessly (pots not included).
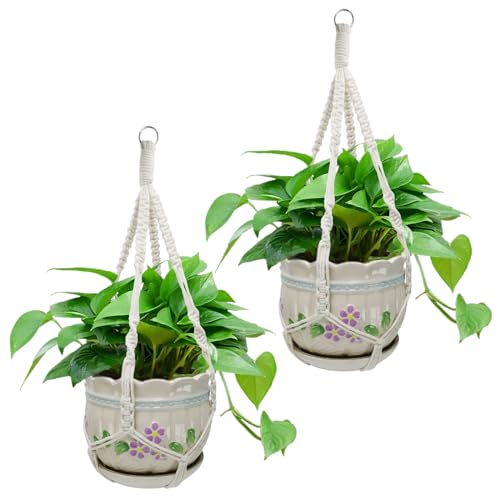
Natural Material: Pot hangers for plants crafted from 100% pure cotton rope, free from artificial additives or chemicals, ensuring your plants thrive in a natural environment while adding a touch of nature to your living space.

Elevate your boho decor with our macrame plant hangers indoor, designed as a versatile plant macrame hanger for windows, ceiling displays, or as macrame hanging wall planters. The 35” length is ideal for showcasing your favorite plants in any room.
Spring Crafts for Fresh Inspiration
Choose fresh petals, citrus peels, and light fabrics for spring projects that brighten your home.
Try pressed-flower lanterns using glass jars, mod podge, and petals from peonies or pansies.
Press flowers between parchment for a week, then arrange them on the jar and seal.
The result gives soft, floral light for a patio or table.
Make botanical tea towels with leaf printing.
Paint the veiny side of a leaf with fabric paint and press onto pre-washed cotton.
Heat-set the paint for washability.
You can also craft citrus-and-herb infused olive oil in sterilized bottles.
Layer lemon zest and rosemary, pour warmed olive oil over them, and let flavors meld for a week.
For quick spring decor, paint a coir welcome mat with tulip stencils.
Use outdoor acrylic so it lasts.
These choices give you bright, practical items you’ll use daily.
Fall Crafts to Embrace the Season
Use warm tones and natural textures to capture fall without complex tools.
Make upcycled denim garden totes from old jeans by cutting a leg, sewing one end, and adding straps.
Embroider small leaf motifs or attach leather patches for durability.
Create hand-stamped garden markers from smooth river rocks or wooden spoons.
Use metal alphabet stamps or a woodburning tool to label herbs and vegetables.
Seal painted rocks with outdoor varnish to withstand wet weather.
Try decoupage trays with vintage floral prints in autumn hues.
Layer paper designs and seal with several coats for a durable serving tray.
These projects turn thrifted or recycled materials into useful fall decor that also organizes your space.
Winter Crafts for Cozy Creativity
Shift to warm textures and gift-ready items for winter.
Make beeswax candles with embedded dried lavender or chamomile.
Melt pure beeswax in a double boiler, add essential oil sparingly, and press botanicals into the top before it sets.
These smell light and natural.
Try embroidered hoop art with simple winter motifs—evergreen sprigs, pine cones, or the word “warm.”
Use satin stitch and french knots on linen for clean, handmade wall art.
Memory wire herb-identification bracelets also work as small gifts; stamp metal charms with herb names and add green glass beads.
Concrete planters with geometric designs give a modern contrast to cozy interiors.
Use silicone molds and press lace or textured paper into wet concrete for patterning.
Let them cure fully before planting succulents or small evergreens.
Floral and Nature-Inspired DIY Decor

This section shows simple, hands-on projects that bring real blooms and natural materials into your home.
You’ll learn how to press flowers for art and lanterns, make a tulip or garden wreath, and craft small wood butterfly pieces to hang or place on shelves.

Three-layer Mold Design: Consists of hard plastic shell and silicone inner, the flowerpot will not deform and easy to demould.

【Silicone Planter Mold】The inner liner is made of silicone, with smooth surface, easy to demold, clean and re-use.

Mold Combination: the concrete molds for pots consist of 2 parts, one is a plastic frame with a strong shell that supports the weight of the concrete without changing its shape; The other part is a silicone resin that allows the mold to have a smooth surface for easy release, cleaning and reuse
Pressed Flower Art and Lanterns
Press flowers between absorbent paper and heavy books for 1–3 weeks until fully dry.
Use flat flowers like pansies, daisies, or small tulip petals for best results.
Mount them on archival paper with a tiny drop of clear-drying glue or use clear adhesive sheets.
Frame under glass to protect colors and keep sunlight indirect to slow fading.
For lanterns, place pressed flowers between two glass panes or inside a clear votive holder with clear-drying resin.
Make sure petals sit flat before sealing resin.
Use battery tea lights rather than hot flames to avoid heat damage.
Label supplies: press paper, tweezers, archival glue, clear resin, glass panes, and battery lights.
Keep designs simple: a single stem, a small spray, or a tight collage.
Arrange by size and color before gluing.
If you press wedding or sentimental blooms, note the date on the back of the frame.
Making a Tulip Wreath or Garden Wreath
Start with a form: grapevine, foam, or a repurposed garden hose wreath base.
For a tulip wreath, use faux tulips wired to the base or preserved real tulip heads wired onto floral picks.
Place larger blooms evenly, then tuck smaller filler flowers and greenery between them.
For a garden wreath that lasts outdoors, choose waterproof stems or tightly sealed preserved flowers.
Secure items with floral wire and hot glue for extra hold.
Add a backing ribbon or loop for hanging on a door or fence.
Design tips: work in thirds for balanced spacing, cluster three to five blooms as focal points, and angle stems slightly outward to create depth.
If using a garden hose wreath, wrap it in burlap or moss first so glue and wire have a textured surface to hold.
Creating Wood Butterfly Decor
Cut butterfly shapes from thin plywood or buy pre-cut wood blanks.
Sand edges smooth and paint with acrylics or stain for a natural look.
For a textured finish, glue on small pressed flower petals or thin moss before sealing with matte varnish.
Mount options: attach small sawtooth hangers for wall display, glue on a dowel for a potted plant stake, or leave freestanding with a thin base.
Use different sizes and finish styles to create a layered wall cluster.
If you want garden-friendly pieces, seal wood with outdoor polyurethane and use rust-proof hangers.
You can also combine a tiny pressed flower center with painted wings for a mixed-media effect.
Creative Paper Crafts for Adults

These projects use simple tools and a bit of patience to make stand-out decor, gifts, and keepsakes.
You’ll learn how to shape paper into layered wall art, handmade cards and journals, and long-lasting floral pieces.

🎨 【72-Piece Botanical & Butterfly Kit】: Ultimate nature stencil collection! Features 72 reusable templates including delicate wildflowers, tropical leaves, monarch butterflies, dragonflies, and forest foliage. Perfect for whimsical wall murals, scrapbooking embellishments, garden art journals, kids' room decor, and mixed media projects. Endless floral insect designs to explore!

Measurements - 69” wide x 70” long. No liner needed. 12 hooks included. Made in Türkiye.

Watercolor Floral Art - Infuse your bathroom with a calming, poetic atmosphere inspired by watercolor and ink-wash artistry. Soft grey tones blend seamlessly with delicately brushed florals and drifting leaves, creating a scene that feels serene, expressive, and full of natural elegance. The gentle gradients and airy strokes evoke the tranquility of a misty garden morning, transforming your daily routine into a soothing visual experience.
Paper Quilling for Unique Wall Art
Paper quilling lets you roll narrow strips into coils, teardrops, and scrolls to build detailed images.
Start with 3mm–5mm quilling paper, a slotted tool, glue, and a firm backing board.
Plan a simple sketch first, then group coils by color and size to form shapes like leaves, waves, or geometric patterns.
Use a foam board or heavy cardstock as your base.
Glue each quilled piece precisely, holding for a few seconds so it sets.
For textured, museum-style pieces, layer coils to add depth and shadow.
You can frame finished pieces under glass to protect from dust and flattening.
Try mixing quilling with pressed flower art by gluing a single dried bloom into the composition for contrast.
For larger installations, mount several quilled panels in a grid.
Label materials and measurements on a small tag to repeat the design later.
DIY Greeting Cards and Journals
Handmade cards and journals let you personalize messages and designs for friends or your own use.
For cards, cut heavyweight cardstock to size, add patterned paper or vellum, and use a craft knife for window cutouts.
Embellish with small quilled shapes, die-cuts, or a pressed flower to make a focal point.
To make an embroidered notebook, bind blank pages with a stitched spine.
Punch evenly spaced holes through cover and pages, then sew using waxed thread in simple patterns like a cross-stitch spine or floral motif.
You can glue a thin strip of washi tape along the edge for extra strength.
Use acid-free paper and archival glue if you plan to store keepsakes inside.
Add pockets or envelopes to hold gift cards or notes.
For bulk projects, create a template for card fronts and repeat the layout to save time.
Crafting Decorative Paper Flowers
Paper flowers can look realistic or stylized depending on your paper and cutting technique.
Start with crepe paper for lifelike petals or cardstock for more structured blooms.
Cut petal shapes by hand or with a punch, then shape edges with a rounded tool or your fingers to curl petals inward.
Assemble flowers around a wire or rolled-paper stem.
Use hot glue or PVA glue to secure layers, building from small inner petals to larger outer ones.
Add details like painted veining, inked edges, or a tiny quilled center for texture.
You can create wreaths, bouquet arrangements, or single stems for a vase.
Pressed flower art works well alongside paper flowers when you want a mixed-media look; place a pressed leaf behind a paper bloom for a natural effect.
Store finished flowers flat or in tall boxes to keep shape.
Textile and Fabric-Based May Crafts

These projects use small amounts of fabric, basic sewing, and simple embellishments to make useful items and gifts.
You’ll learn how to pick fabrics, add pockets or closures, and use embroidery to personalize pieces.

12-Piece DIY Painting Kit: This set includes 12 floral line-pattern canvas tote bags (6 spring flower designs, 2 of each), plus 12 plum blossom palettes, 12 paint boxes, and 24 brushes—everything needed for spring group art activities, DIY craft projects, or creative gatherings. As a complete paint your own tote bags kit, it provides ample supplies for multiple people to join in, making it easy to host art events or hands-on workshops without extra purchases

COMPLETE DIY TOTE KIT - Includes a 24" x 43" premium cotton canvas fabric panel and step-by-step assembly instructions to create one finished tote bag.
DIY Tote Bag and Home Accessories
Pick a sturdy cotton or canvas if you want a tote that actually lasts. Cut two rectangles—18×14 inches works for most folks—then sew the sides and bottom with a half-inch seam.
Topstitch the opening for extra strength. For straps, cut 22 to 26-inch lengths from the same fabric or use webbing.
Sew each strap on with a box-and-X pattern so they hold up. Want a pocket? Sew a 6×8 inch piece inside before you put the bag together.
Add a magnetic snap or zipper if you like your stuff secure. A lining hides the seams and gives the corners more structure—just pop a small square of interfacing in there.
You can use these same steps to make a table runner, pillow cover, or a little fabric basket. Just change up the shape or size.
Materials checklist:
- Cotton or canvas fabric
- Thread, scissors, pins
- Interfacing and zipper or snap (optional)
- Sewing machine or hand-sewing needles
Making DIY Hair Accessories
Start with scrunchies and headbands—great for using up those fabric scraps. For a scrunchie, cut a 4×18 inch strip, fold it lengthwise, sew most of the way, then turn it right side out.
Thread a 7–9 inch piece of elastic through, stitch the gap closed, and you’re done. For a knotted headband, use a 4×20 inch strip, sew and turn, tie a knot, and tack it in place by hand.
Add buttons, beads, or tiny fabric flowers if you want to get fancy. Lightweight interfacing helps bows hold their shape.
If you’re making gifts, bundle up a few styles in a pouch or toss in a matching fabric-covered hair clip. Each one takes 10–30 minutes, so you can make a bunch for gifts or even a little market stall.
Embroidered Details for Personal Touches
Embroider small designs on tote bags, hair ties, or even notebook covers to make them yours. Trace a simple pattern with tracing paper or use an iron-on transfer.
Pop your fabric in a hoop to keep it taut. Stick to basic stitches—backstitch for lines, satin stitch for filled areas, and French knots for dots or flower centers.
Use six-strand embroidery floss, but split it to 2–3 strands for neat stitching, especially on thin fabrics. Always practice your design on a scrap first.
For a notebook cover, cut fabric to wrap around the book, stitch your design, then glue or sew the edges into a sleeve. Dab a bit of clear fabric glue on the back of your stitches to keep them from unraveling.
Fun Decorative Crafts: Mugs, Rocks, and Lanterns

You don’t need fancy supplies for these projects, and they make awesome gifts or home decor. Paint rocks for garden markers or doorstops, turn empty cans into lanterns, or try nail polish on mugs for a one-of-a-kind present.

【Complete Pressed Flower Art Kit for Beginners to Creators】: The flower pressing kit Includes 2 x wooden press plates, 6 x drying papers, 4 x absorbent cardboards, 4 x wood screws, 8 x wing nuts, 1x brush, 4 x greeting cards, 4 x bookmarks, 5 x meters of ribbons, 4 x envelopes —no extra materials needed. Ready to play right out of the box, perfect craft kit for kids and crafting beginners.

[PRESS FLOWERS]- Using drying and pressing actions to transform the fresh flowers into dried flower complete, Keep flowers and plants in good shapes and vivid colors.

Complete Crafting Kit: this bundle includes 60 pieces of pink purple dried flowers and leaves, providing a rich variety of colors and textures for your projects; Additionally, it comes with precision pink tweezers for easy handling of delicate materials, 10 meters of brown suede cord for tying and hanging creations, and 20 natural wood slices to serve as a sturdy base for your designs
Rock Painting and Painted Rocks
Find smooth, flat rocks in your yard or pick some up at the craft store. Wash and dry them before you paint so nothing peels off.
Use acrylic paints or paint pens for bright colors and crisp lines. Seal them with a clear spray so they survive the weather.
Try geometric patterns, plant labels, or little animals—simple is good for starters. For garden markers, paint the top, then write the plant name with a fine-tip permanent marker.
Gift rocks? Add a short quote, initials, or a small mandala. Work in layers and let each one dry before adding the next.
Use a toothpick or dotting tool for tiny details. Keep scrap paper handy for practice before you paint the real thing.
Tin Can Lanterns and Upcycled Decor
Save empty tin cans, peel off the labels, and wash them out. Sand any sharp edges so you don’t get cut.
Punch holes in a pattern with a hammer and nail or a little drill—stars, stripes, or just random dots all look cool. Pop a tea light or LED candle inside.
Paint the outside with spray or acrylic paint, or wrap twine or patterned paper around it for texture. Add a wire handle if you want to hang it.
For a tabletop display, group together different sizes and patterns. Always use a heat-safe surface for candles, or just stick with battery lights if you want to play it safe.
Nail Polish Mugs and Gift Ideas
Grab a plain ceramic mug and a few nail polish colors. Fill a shallow container with room-temp water, drip in the polish, and swirl with a toothpick.
Dip the mug in to pick up the pattern. Let it dry in the air.
If you want more control, paint stripes or dots with a fine brush. Cure painted mugs as the paint instructions say—usually that means baking them.
Hand-wash only, unless your paint says it’s dishwasher-safe. Pair the mug with tea bags, cocoa mix, or a small plant for a ready-to-go gift.
Wrap it up with cellophane and a ribbon. Use non-toxic, ceramic-safe polish or paint for best results.
Wreath Making Ideas for Every Occasion

You’ll find wreath ideas for any door, style, or season here. I’ll list the main materials, steps, and a few tips for hanging and storing.
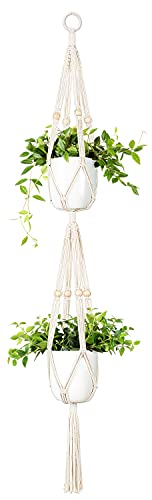
This macrame plant hanger supports two flower pots. Show your plants some love with this elegant, vintage-inspired macrame double plant hanger. Simple, yet meticulously handcrafted, this beauty would be gracing your home or balcony garden, or brightening up an office

HIGH QUALITY MATERIAL - The 2 pack plant hanger indoor is made of cotton cord. Sturdy, durable and premium quality. hanging basket has a strong flexible woven design that can accommodate various shapes and sizes of planters (pots not included).

【Handmade Craftsmanship】Each macrame plant hanger is meticulously handwoven using cotton rope, ensuring consistent knotting and durability. The tight braiding technique prevents fraying, while the absence of tassels offers a clean, minimalist boho aesthetic. Ideal for showcasing plants in living rooms, patios, or balconies, this artisanal design adds a personalized touch to home decor while still having a classic retro feel that matches both modern and conventional styles.
DIY Wreath for Entryways
Pick a sturdy wreath form—grapevine, wire, or straw—whatever matches your vibe. Attach faux greenery and seasonal picks with floral wire.
Add a focal point like a wood initial, a sign, or a bunch of silk flowers, either at the bottom or off to the side. You’ll need wire cutters, a hot glue gun, and floral wire.
Start by wrapping greenery around the form in small bunches, overlapping stems to hide the base. Hang it with ribbon or a hidden wire loop, and measure so it sits at eye level.
Store it flat in a box with tissue or hang it in a cool closet. Swap out one accent each season instead of making a whole new wreath every time.
Pom Pom Wreath for Vibrant Spaces
Make a pom pom wreath for a pop of color in a bedroom or craft space. You’ll need a foam or wire form, three to five yarn colors, and a pom pom maker or cardboard.
Wrap yarn around the maker, tie it tight, and trim for even balls. Hot-glue pom poms to the form in a tight pattern.
Alternate colors in rings or go random for a playful look. Leave a spot open for a ribbon hanger.
This wreath is lightweight and safe for kids’ spaces. If you want it outside, give it a clear spray and keep it under cover.
Easter Egg Wreath for Spring Festivities
Try an Easter egg wreath with a straw or wire form, plastic eggs, and some spring greenery. Pick 12–20 pastel eggs—smaller ones keep it from getting too bulky.
Add faux baby’s breath, silk leaves, and mini bows for texture. Attach eggs with hot glue or wire picks, spacing them out.
Tuck greenery between eggs and secure with floral wire. Pop a bigger bow at the top or bottom, and use a matching ribbon to hang it.
For a natural look, try wooden eggs painted in soft colors. Store the wreath in a labeled box so you can reuse the eggs another year.
Jewelry and Art Techniques for Adults

Let’s talk about making jewelry you’ll actually wear and some modern art that’s easier than it looks. I’ll keep the steps simple and toss in a few tips so you get a solid finish.

【Silicone Planter Mold】The inner liner is made of silicone, with smooth surface, easy to demold, clean and re-use.

【Silicone Planter Mold】smooth surface, easy to demold, clean and re-use

🌴【Oversized Paver】19.7"x19.7"x1.7" in size, The concrete mold can make staggered brick paths,patio ,Yard and Lawn.
Simple Jewelry Making Projects
You don’t need much for necklaces, bracelets, or earrings—just pliers, wire cutters, jump rings, and some beads. Start with stringing beads on wire or making wrapped loops with headpins.
For a basic beaded bracelet:
- Measure your wrist and add half an inch.
- Cut beading wire, slide on a crimp bead, add your beads, then another crimp.
- Flatten the crimps with pliers and attach a clasp with jump rings.
For earrings, use headpins and pliers to make a loop, then add the ear wire. Choose good-quality findings so your jewelry lasts.
Keep beads from rolling away by using a tray or bead mat. Practice one technique at a time before you try mixing them.
Paint Pouring for Modern Art Pieces
Paint pouring is messy but fun. Use fluid acrylics, pouring medium, and a sealed canvas or wood panel.
Mix paint and medium until it’s runny, like milk—ratios depend on the brand, so test in small cups. Try a “dirty pour”: layer colors in a cup, flip it onto the canvas, and let the paint spread.
Tilt the canvas to move the paint and watch for cool patterns. Add a few drops of silicone to get those neat “cells.”
Use a torch to pop bubbles and make the cells bigger. Gloves and a covered table save you a lot of cleanup.
Let the piece cure for a day or three, then seal with resin or varnish for shine.
Frequently Asked Questions

Here are some quick answers to common craft questions—ideas, supplies, skills, communities, selling tips, and even crafts for stress relief.

🛀【Package&Size】: One set of 72W x 72H (180cm x 180cm) shower curtain and comes with 12 C-shaped hooks, easy to install and slide.

EXCELLENT QUALITY: Our colorful shower curtain is made of 100% polyester fabric, which is soft and comfortable to touch and not easy to wear. The watercolor leaf shower curtain consists of beautiful flowers and delicate leaves.

【Size】 72×72 inch shower curtain,Suitable for most bathroom.
What are some easy DIY craft projects for adults to start with?
Paint some terra-cotta pots, knot up a simple macramé keychain, or whip up a no-sew throw pillow cover.
Try paper collage bookmarks, poured-salt candle holders, or stamped tea towels if you want to learn a new technique fast.
You’ll only need a few tools and can finish most projects in under two hours. It’s a good way to get your feet wet before buying a bunch of supplies.
Where can I find eco-friendly materials for adult craft projects?
Thrift stores are goldmines for fabric, jars, and frames you can upcycle.
Ask local coffee shops for cardboard sleeves, and reuse shipping boxes from your online shopping.
Dig through remnant bins at sewing stores and check Facebook swap groups. Some cities even run “scrap exchanges” for trading leftover materials.
What advanced crafting techniques can adults learn to expand their skills?
Try your hand at ceramic wheel throwing, fused glass, or advanced embroidery like goldwork.
Polymer clay sculpting, leather tooling, and realistic watercolor portraits are all solid choices if you want to level up.
You’ll probably need special tools or studio time, so look for classes or local maker spaces.
Are there any online communities or workshops for adults interested in crafting?
Facebook groups, Reddit (like r/crafts or r/DIY), and Discord servers are great for chatting with other makers.
Check out Skillshare, Domestika, or your local community college for structured classes.
Look for local maker spaces and craft co-ops—they often have weekend workshops or shared studio hours.
How can I turn my crafting hobby into a side business?
Test small batches of your creations at local markets or online (Etsy, Shopify—pick your favorite).
Figure out your material costs, add a bit for time and fees, and set prices that actually make sense.
Take clear photos, write short descriptions, and post regularly on Instagram or Pinterest. Keep your bookkeeping simple and track your orders so you don’t get overwhelmed.
What are some therapeutic craft activities recommended for stress relief?
Try knitting or crochet. The repetitive stitches can really calm your breathing and mind.
You might also enjoy mindful coloring, clay hand-building, or simple weaving. Focus on the rhythm, not on getting everything perfect.
Keep your craft sessions short—maybe 15 to 30 minutes. Pick projects that let you repeat motions and don’t need a bunch of decisions.