You want ideas that feel doable and exciting, so you actually pick up a brush.
Spark new ideas by mixing simple sources: places you see daily, quick photo studies, color experiments, and prompts that push you to try small changes.
Start small—try one focused exercise, and you’ll find a steady stream of painting ideas to choose from.
This post tosses out clear, practical ways to find and grow ideas—whether you lean toward landscapes, portraits, abstracts, or just quick practice pieces.
Expect short prompts, easy techniques, and a few systems you can actually use each week to keep ideas flowing.
Key Takeaways
- Try small, repeatable exercises to generate lots of workable painting ideas.
- Use simple tools and short studies to explore color, light, and composition.
- Pick prompts that match your interests and build a routine to stay inspired.
Understanding Different Types of Painting Ideas

You’ll get some concrete ways to choose painting ideas that fit your skills and goals.
The three approaches below show how to work with accurate visuals, playful shapes, or bold concepts to start a new piece.
Realistic vs. Abstract Inspirations
Realistic ideas ask you to copy or interpret visible subjects: a still life of fruit, a portrait, or a street scene at noon.
Focus on light, proportion, and color matching.
Take photos or set up a simple reference to study shadows and texture.
This builds technical skill and makes it easier to sell or exhibit work that viewers instantly recognize.
Abstract painting lets you break away from literal forms.
Use color, shape, and brushwork to express mood or pattern.
Try reducing a scene to three colors or translating the rhythm of a song into brushstrokes.
Mix realism and abstraction by keeping one clear element—like a face or a tree—and abstracting the rest.
What do you want to practice?
If you want better draftsmanship, pick realistic subjects.
If you crave fresh, unique painting ideas, lean into abstraction and play with mark-making, palette, and scale.
Using Everyday Life for Inspiration
Everyday life throws you endless creative painting ideas: your coffee cup, a bike on a rack, or morning sunlight on blinds.
Carry a small sketchbook or just snap quick photos on your phone.
These snippets turn into series later—try painting the same subject at different times of day to explore light.
Look for details most people ignore: worn fabric patterns, reflections in puddles, or the way steam blurs a window.
Use simple prompts like “five-minute sketch” or “limited palette” to turn routine scenes into focused practice.
You’ll build a bank of unique painting ideas that feel personal and true to your experience.
Try themed runs: paint three plates, five doorways, or a week of breakfasts.
Repetition sharpens observation and leads to clearer, more confident work.
Imaginative and Conceptual Prompts
Imaginative prompts push you to invent scenes, characters, or symbols.
Start with prompts like “a city made of glass,” “a portrait of a memory,” or “what loneliness looks like in color.”
Sketch thumbnails to test composition before you commit to a full canvas.
Use metaphors—color for emotion, shape for movement—to guide your visual choices.
Conceptual painting ideas focus on message and structure.
Plan a statement, then choose visual tools: contrast for conflict, repetition for routine, or collage for layered stories.
Mix media—acrylic with paper, ink with digital prints—to create painting ideas that stand out.
Keep a list of prompts and pick one at random when you’re stuck.
Randomness often leads to surprising, original work that stretches your practice and builds a distinctive voice.
Choosing the Right Painting Medium

Pick a medium that fits the idea you want to paint, how fast you work, and where you’ll display the piece.
Think about drying time, color behavior, and cleanup before you grab supplies or a starter acrylic paint set.
Acrylic and Its Versatility
Acrylic paint dries fast and works for layering and mixed media.
You can thin it with water for washes or use heavy body acrylics for texture.
If you buy an acrylic paint set, look for a range of primaries, a white, and a black to mix most colors.
Acrylics are low-odor and clean up with soap and water.
That makes them great for small home studios or quick studies.
They can darken a bit when dry, so test swatches to see how colors shift.
Use gels and mediums to slow drying, boost gloss, or add texture.
Those additives help you mimic oil-like blends or build impasto.
Acrylics work on canvas, wood, paper, and even some plastics.
Exploring Watercolor and Gouache
Watercolor uses pigment suspended in gum arabic and needs paper designed for wetness.
It gives transparent washes and bright highlights by leaving paper white.
You have to plan highlights in advance because it’s tough to paint light over dark.
Gouache is like opaque watercolor.
It lets you layer light over dark and gives flat, matte color that suits illustration and graphic styles.
Gouache reactivates with water, so finished pieces need care or a fixative if moisture is a risk.
Both travel well and require minimal gear: paints, brushes, a palette, and proper paper.
Watercolor leans toward looseness and soft edges; gouache gives solid color and crisp shapes.
Try small studies to see which fits your subject and how much control you want.
Oil Paint and Its Advantages
Oil paint dries slow, which helps with blending and gradual color shifts.
That makes oil ideal for portraits, detailed realism, and glazing techniques.
You can work wet-on-wet or layer thin glazes after each layer cures.
Oils need solvents or specialized mediums for thinning and cleanup, and good ventilation matters.
They often stay workable for days, so you can refine values and edges without rushing.
Oils tend to keep rich chroma and a satin finish when cured.
Start with a basic palette: titanium white, a warm and cool primary, and a dark like burnt umber.
Use primed canvas or panel to avoid adhesion issues.
If you want less odor, look for solvent-free oil mediums and odorless mineral spirits.
Essential Painting Supplies to Spark Ideas

These items give you control, let you experiment, and keep things tidy.
Choose a small set of reliable brushes, a mix of canvas sizes, and a few tools to try new marks and layouts.
Must-Have Brushes and Paintbrush Sets
Pick a paintbrush set that covers rounds, flats, and filberts so you can make lines, fill shapes, and blend soft edges.
For acrylics and oils, grab hog-bristle or stiff synthetic flats (sizes 6–12) for bold strokes and medium rounds (sizes 2–6) for details.
For watercolors, use soft synthetic or sable rounds (sizes 4–8) and a wash brush (10–14) for broad washes.
Start with one multi-piece brush set and add single high-quality brushes later.
Clean brushes after each session with mild soap and shape bristles while wet.
Replace worn brushes when bristles split—they ruin crisp edges and fine detail.
Practical checklist:
- Round (size 2, 4, 6)
- Flat (size 6, 10)
- Filbert (size 4 or 6)
- Wash brush (for watercolor)
- Synthetic for acrylics, natural or synthetic blend for oils
Selecting Canvases and Canvas Panels
Choose canvases and panels based on size and texture.
Start with a few canvas panels (8×10, 11×14) for practice—they’re inexpensive and stable.
Use stretched canvas (16×20) when you want a final piece or more texture.
For detailed work, pick a smooth-primed canvas; for expressive marks, go with a toothier linen or cotton.
Canvas panels and gessoed boards let you experiment with color studies or composition without wasting expensive stretched canvases.
Keep at least one small heavyweight paper pad (mixed-media) for quick sketching and color tests before you commit to canvas.
Buy a pack of canvas panels and one stretched canvas to cover both studies and finished pieces.
Helpful Tools: Easel, Masking Tape, and More
An easel holds your work at a comfortable angle and frees your hands for varied strokes.
Get a tabletop easel for small pieces and a standing easel for larger canvases.
Adjustable height and tilt let you change perspective and reduce distortion.
Masking tape helps you block off clean edges, create geometric shapes, or mask areas for later glazing.
Use low-tack painter’s tape so paper and canvas won’t tear.
Add these tools to your kit:
- Palette (plastic or wooden) for mixing
- Palette knife for texture and scraping
- Cup or jar for brush cleaning
- Kneaded eraser and graphite pencils for underdrawing
Keep supplies organized in a tote or drawer so you can grab a specific brush, tape, or panel when an idea hits.
Easy Painting Ideas for Beginners

Start with projects that limit colors and focus on simple shapes.
Pick one tool and one surface—like acrylic on a small canvas or watercolor on cold-press paper—so you can learn one set of marks at a time.
Simple Landscapes and Mountain Scenes
Choose a single focal mountain and a clear horizon line to keep composition easy.
Paint the sky first with a wash or blended gradient, using two to three colors for a sunset or daytime sky.
For mountains, block in large shapes with a mid-tone, then add highlights and shadows with a smaller brush.
Use cooler, bluer tones for distant peaks and warmer browns or greens for foreground rocks and trees.
Add texture with a dry brush or palette knife to suggest rock faces.
For depth, make objects smaller and lighter in value as they recede.
Try a 9×12 canvas to practice without committing to a big surface.
Watercolor Flowers and Botanical Themes
Start by painting the overall petal shapes as big, soft washes—avoid tiny details at first.
Mix a wet-on-wet wash for petals to create smooth color blends, then come back with wet-on-dry strokes for veins and edges.
Use three colors max per flower to keep the palette simple and harmonious.
Paint stems and leaves with a thin round brush and a darker green mixed from blue and yellow—this looks more natural than pure green.
Experiment with lifting (blotting wet paint) to make highlights and with layering light glazes to build depth.
Try painting a single flower on a 6×8 paper to practice composition.
Butterfly and Animal Motifs
Sketch bold, simplified shapes first: a butterfly’s symmetrical wings or an animal’s basic silhouette.
For butterflies, mirror simple patterns on each wing; use a light wash to lay base colors and fine liners to add spots and veins.
For pets or wildlife, focus on the head and a strong pose to capture character without full realism.
Limit detail to the eyes and main markings.
Use contrasts—light on dark fur, dark on light wings—to make features pop.
Work on small canvases or panels so brush control and pattern repetition feel manageable.
Try painting one motif per session to build confidence.
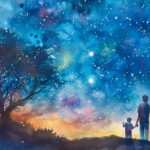
Galaxy and Night Sky Paintings
Block the background with a dark base: deep blue, indigo, or black.
Add nebulae or color clouds by applying diluted bright colors—purples, pinks, and teal—using a sponge or soft brush for soft edges.
Flick white paint with a toothbrush or stiff brush to create star fields.
Create glowing stars by placing small white dots, letting them dry, and glazing around them with watered-down color for a halo.
For planets, paint a round shape, shade it with a darker rim, and add a tiny highlight.
Use a 12×16 canvas to get enough space for color transitions and layered washes.
Creative Techniques to Unlock New Ideas

These techniques focus on hands-on play, surprising results, and controlled experiments that spark fresh concepts.
You’ll explore fluid motion, dramatic surface effects, and strong value contrasts to build new painting directions.
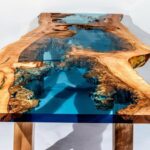
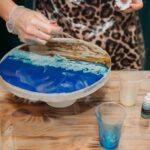
Acrylic Pouring and Fluid Art
Acrylic pouring uses thinned paint, a pouring medium, and sometimes silicone to create cells and flowing blends. Try starting with a flip cup or dirty pour on a primed panel.
Mix paint and medium at a 1:1.5 ratio, then tweak until the paint moves easily but still pops with color. I usually work on small panels (8×10–12×16 inches) to test color mixes and tilt tricks without burning through supplies.
Layer high-contrast colors and finish with a quick torch pass to pop open cells. Keep a spray bottle of water nearby in case you need to soften edges or fix a runaway drip.
Jot down each mix and technique in a short log: colors, medium ratio, additives, pouring method. That way, you can repeat a look or just change one thing next time.
Splatter, Metallic, and Texture Effects
Splatter art injects energy and a bit of chaos. Use a toothbrush, stiff brush, or palette knife to flick diluted acrylic across a dry base.
Change the splatter’s scale by adjusting brush load and your wrist motion. Fast flicks make fine mist; loaded brushes leave bold droplets.
Metallic paints—gold, copper, silver—work best as highlights. They catch the light and can really make a flat area stand out.
Use them in thin glazes or as punchy accents over texture. Build texture with modeling paste, sand gel, or heavy-bodied acrylics.
Press in tools like combs, rags, or palette knives before the paste dries. Once you’ve got texture, splatter and metallics react in new ways, giving you some wild focal points.
Test out textures and metallics on sample boards first. It’s worth seeing how they play with the light.
Monochromatic and Silhouette Painting Projects
Monochromatic painting forces you to explore value, temperature, and edge control with just one color family. Pick a base hue and mix five values from light to dark.
Plan a value map before you start—mark where the lights, midtones, and darks will go to keep your structure clear. Silhouette painting sharpens your sense of shape and composition.
Paint a bold, flat silhouette in a dark value against a graded or textured background. Use masking tape or a cut stencil for crisp edges.
Try combining silhouette and monochrome: let the background shift through values in one color family while the silhouette stays pure dark.
These projects show how small tweaks in value and edge can totally change the mood or focus. They scale up or down pretty well, too.
Unique Approaches and Themed Prompts

Projects with clear constraints tied to a theme push you to make creative choices. Pick a subject, a limited palette, or an odd surface to keep things interesting.
Self-Portrait and Portrait Painting
Focus on one honest goal: show something true about the person, not just their features. Start with a 10-minute gesture or thumbnail to nail down pose and mood.
Work from a mirror, a photo you took, or a live sitter if you’re feeling brave. Pick one technique to practice—maybe glassy glazes for skin, bold shapes for a graphic look, or a three-color palette to really get color mixing down.
Break it into steps: a quick value study, block in main color areas, refine edges, and add highlights at the end. If you get stuck, try a prompt: “portrait that shows a hobby,” “dramatic light,” or “imaginary background.”
For self-portraits, mess around with mirrors at weird angles or shoot one side of your face and flip it to practice symmetry and expression.
Rock Painting and Alternative Surfaces
Grab a smooth, durable rock or something different like a tile, wood slice, or metal can. Clean and prime it with gesso or acrylic primer so your paint sticks.
Use acrylics, paint pens, or enamel for bright, lasting color. Sketch or stencil your design right on the primed surface.
Simple themes work best: tiny landscapes, stylized animals, or just a single word in hand-lettering. Seal finished pieces with spray varnish or epoxy if they’re going outside.
Work in layers—base color, mid-tones, details, then varnish—to keep things crisp. Try painting sets with a linking element, like a shared background color or motif, for a collection that hangs together.
Painting Ideas for Kids and Groups
Pick short, simple prompts and safe materials—washable acrylics, tempera, or water-based inks. Give each kid one clear rule, like “paint only circles,” “use three colors,” or “invent an animal by mixing two.”
Set up stations with one focal tool per table—stamps, sponges, tape, or texture brushes—so kids can try different effects fast. For groups, run collaborative projects: a tiled mural where each paints a square, or a theme challenge like “underwater town” where everyone adds a feature.
Display finished pieces at eye level and use cheap frames or clothespins to show off everyone’s work.
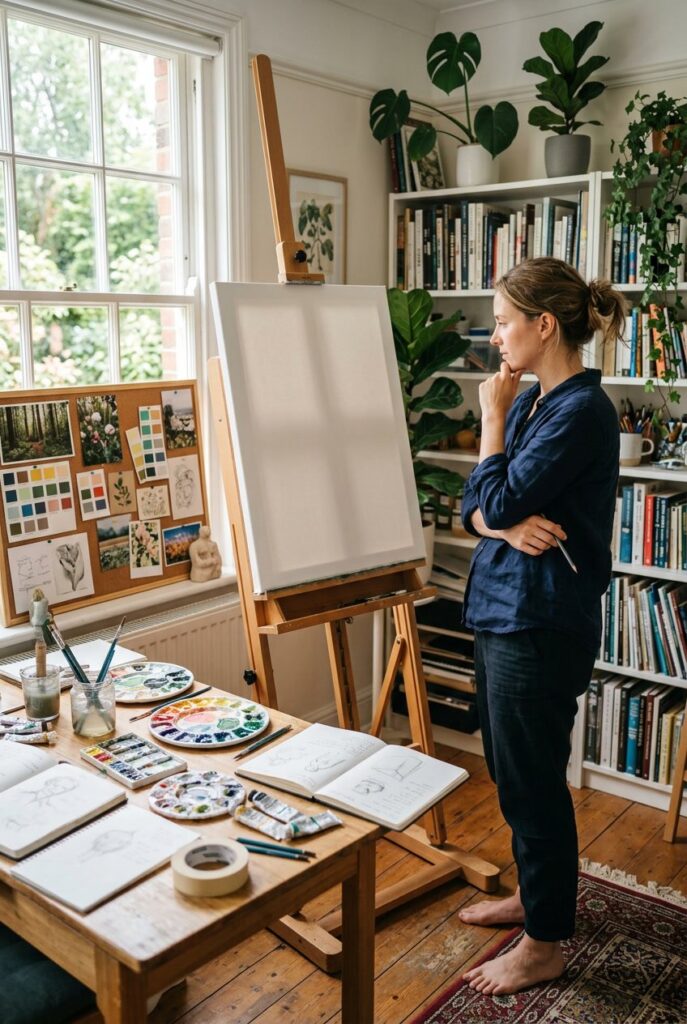
Experimenting with Color and Light

You’ll get a sense of how to build a color palette and how light and shadow shift the mood and form in your paintings. These ideas have practical steps you can use right away.
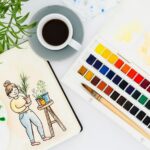
Building an Inspiring Color Palette
Start with a small set of trusty paints: a warm and cool version of each primary (red, blue, yellow), plus white and a neutral gray or brown. Mix swatches on paper to see how each pair and trio acts.
Label each swatch with the mix ratio (like 2:1 blue) so you can repeat the color later. Before you start a piece, plan your palette.
Choose a dominant color, a supporting color, and an accent. Use the dominant in most areas, the supporting for secondary shapes, and the accent to pull the eye.
Test tints and tones by adding white for tints and a touch of gray or the complementary color for tones. Keep a reference strip of five values (light to dark) from each mixed color.
This helps you stay consistent across the painting. Swap out one color each session to push yourself and avoid falling into the same old habits.
Studying Light and Shadow for Depth
Look at a simple object under different lights—daylight, warm indoor bulbs, or cool fluorescent. Take a few photos or do quick sketches.
Notice where the core shadow, reflected light, and brightest highlight land. Those three areas define the form.
Map value first with your reference strips. Block in the darkest shadow and the brightest highlight before working on midtones.
Shadows often pick up color from nearby surfaces, so they’re rarely pure black. Use hard edges for sharp highlights and soft edges where the form turns away.
Change the contrast to control depth: higher contrast brings things forward, lower contrast pushes them back. Step back and check from a distance to make sure the light and value relationships read right.
Frequently Asked Questions

Here are some practical answers you can use right away. You’ll find concrete methods, places to look, quick exercises, and steps to help shape your own style.
What are some effective methods for generating new ideas for paintings?
Keep a sketchbook for fast thumbnails and color swatches. Draw or paint small studies from life or photos to test out compositions and moods.
Set time limits for quick prompts—like a 20-minute scene or a one-color study. Working fast forces you to make choices and often sparks new ideas.
Mix up prompts by combining two subjects, like “portrait + weather” or “still life + movement.” Unexpected combos usually lead to original concepts.
Where can artists find inspiration for their next piece?
Look at local spots: a park at sunset, a bustling market, or an empty warehouse at dawn. Notice the light, color, and textures you could use in a painting.
Dig into online resources: museum collections, curated Pinterest boards, or Instagram hashtags focused on techniques or palettes. Save images and color combos you want to try.
Check out other media—movie stills, fashion lookbooks, poetry lines—for mood, composition, or palette ideas you can steal for painting.
How can I overcome artist’s block when trying to conceptualize a painting?
Start with a small, low-pressure exercise like a five-minute color study or a quick value sketch. Small wins help break the freeze.
Change your environment for a bit—go for a walk, visit a gallery, or sketch outside. New sights often kickstart new ideas.
Limit your choices: pick one subject, one light source, and one mood. Fewer options make it easier to just start.
What techniques can I use to develop my unique artistic style?
Paint the same subject a few times, but change just one thing each round—color temperature, brushwork, whatever. Patterns start to show up, and you can lean into what feels right.
Study artists you admire and break down what you like—edges, palette, composition—but tweak scale, medium, or subject to make it your own.
Keep a log of what you try and what works. Notice which approaches feel most “you,” then use those more in your next work.
Are there any exercises to help stimulate creativity in painting?
Try a 30-day prompt challenge with a tight theme, like “shadows” or “blue objects.” Daily practice sparks ideas and builds skill at the same time.
Play a collage game: cut up photos, fabric, or color chips and make random layouts. Use one as a springboard for your next painting.
Do a “limited-palette marathon”—paint four small pieces with only three colors. You’ll find yourself mixing and matching in ways you never expected.
How do historic art movements influence contemporary painting ideas?
Check out movements like Impressionism if you want to play with light and color. Cubism? That’s your go-to for breaking things apart and reassembling them. Abstract Expressionism, on the other hand, really leans into bold gestures and those wild, expressive marks.
You can take these old-school methods and twist them for today’s world. Try using Impressionist color tricks on city scenes, or bring Cubist composition into paintings of digital gadgets. Maybe you’ll even throw some Abstract Expressionist brushwork into mixed media—why not?