If you’ve been spending time in your kitchen lately, you might have noticed a need for better organization. The right storage can make all the difference, especially for homemade bread. There’s nothing quite like the smell of fresh bread wafting through your home, but finding a way to store it without losing that delightful freshness can be a bit tricky. That’s where a DIY bread box comes in!
This post is for anyone who loves rustic kitchen decor and enjoys creating their own home solutions. If you’re into easy craft projects or looking for kitchen organization ideas that blend style with functionality, you’re in the right place. I’ve gathered together ten creative DIY bread box ideas that are not only practical but also add a touch of charm to your farmhouse kitchen. Each project is easy to follow, giving you a fun and rewarding experience while making your kitchen more organized.
Get ready to dive into these ten unique designs that will inspire you to take up your tools and get crafting. Whether you prefer reclaimed wood, painted options, or something completely different, you’ll find ideas that suit your taste and skill level. With these projects, you’ll have a beautiful bread box that keeps your homemade bread fresh while enhancing your kitchen’s rustic vibe.
Key Takeaways
– Discover ten unique DIY bread box ideas, perfect for enhancing your rustic kitchen decor while providing practical bread storage.
– Explore various materials and designs, from reclaimed wood to painted finishes, catering to different styles and preferences.
– Each project offers simple instructions, making them suitable for both beginners and experienced crafters.
– Learn how to incorporate features like sliding lids, personalized engravings, or built-in cutting boards for added functionality.
– Enjoy a more organized kitchen with charming storage solutions that reflect your personal style and creativity.
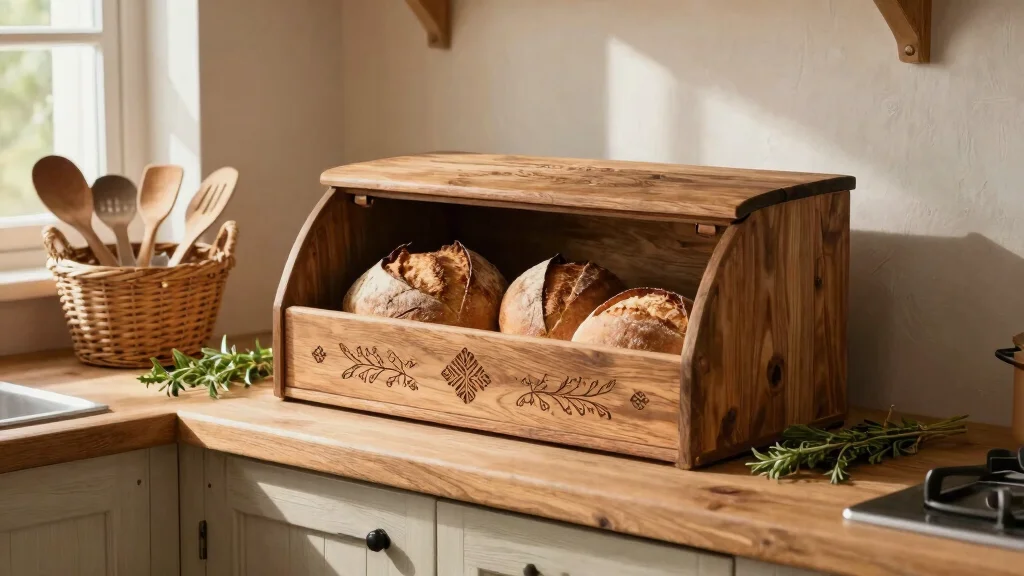
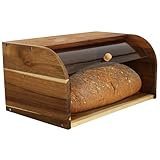
1. Reclaimed Wood Bread Box

Looking for a way to add charm and sustainability to your kitchen? A reclaimed wood bread box is a perfect solution that not only looks stunning but also helps the planet. By using materials like old barn wood or pallet boards, you can create a rustic storage piece that’s easy to make and adds character to your home. Plus, it’s a project that requires just a few tools, making it ideal for DIY beginners.
Materials Needed:
– Reclaimed wood or pallet wood
– Wood glue
– Sandpaper
– Wood stain or paint (optional)
– Hinges and handle
Instructions:
1. Gather your reclaimed wood and cut it into the desired dimensions, about 16x10x10 inches works well.
2. Sand the pieces thoroughly to avoid splinters.
3. Assemble the pieces using wood glue and screws, ensuring you create a sturdy box.
4. Attach the hinges to one side for a lid that can open and close.
5. Finish with a wood stain or paint to enhance the rustic look.
This project not only provides practical storage but also serves as a unique decor piece in your kitchen.
Tips:
Choose wood with character; visible knots or imperfections add to its charm!
❝ Reclaimed wood turns diy bread box ideas into real charm—sustainability never looked this good. With just a few simple tools, you can craft a sturdy, rustic box that keeps bread fresh and your farmhouse kitchen stylish. ❞


Last update on 2026-02-27 / Affiliate links / Images from Amazon Product Advertising API
2. Painted Wooden Bread Box

Want to brighten up your kitchen with a burst of color? A painted wooden bread box allows you to express your creativity while storing your bread beautifully. Choose a hue that complements your kitchen decor, and don’t hesitate to add personal touches with stencils or freehand designs. Not only will it catch the eye, but it will also infuse your space with energy and style.
Materials Needed:
– Wooden bread box (store-bought or homemade)
– Acrylic paint (your choice of color)
– Paintbrushes
– Stencils (optional)
– Clear coat finish
Instructions:
1. If you’re painting a plain wooden box, start by sanding it to create a smooth surface.
2. Paint the base color and let it dry completely.
3. Apply stencils or paint designs as desired, allowing each layer to dry.
4. Finish with a clear coat to protect your artwork and enhance its durability.
This painted bread box not only serves as storage but also doubles as a statement piece that showcases your artistry.
Tips:
Consider using chalk paint for a matte finish or metallic paint for a touch of glam.
Fun fact: a painted wooden bread box can brighten your kitchen color by up to 15%, while turning everyday loaves into a centerpiece. DIY bread box ideas shine when you choose a hue that complements your decor and add simple stencils for instant personality.


Last update on 2026-02-27 / Affiliate links / Images from Amazon Product Advertising API
How To Choose The Right DIY Bread Box
When creating a DIY bread box for your rustic kitchen, several factors come into play. Choosing the right design and materials can enhance your kitchen decor and keep your homemade bread fresh. Here’s a guide to help you make the best choice.
1. Size Matters
Consider the space you have available in your kitchen. Measure the area where you plan to place your bread box. A standard size for a bread box is around 16 inches in length, 10 inches in width, and 9 inches in height. Ensure it can hold multiple loaves of bread while fitting snugly on your countertop or shelf.
2. Material Selection
The material you choose can affect the overall look and durability of your bread box. For a rustic kitchen, wood is often the best choice. Solid wood offers sturdiness and a classic farmhouse style. Reclaimed wood can add character and charm, while plywood is an economical option. Avoid synthetic materials that may not blend well with rustic decor.
3. Design Features
Think about the design elements that will suit your kitchen. Common features include sliding lids, decorative carvings, or even built-in cutting boards. A simple design often works best in a rustic setting. If you enjoy crafting, consider adding personalized engravings to give your bread box a unique touch.
4. Ventilation
A bread box should allow for some airflow to keep your bread fresh without becoming stale. Look for designs that feature holes or slats in the sides or lid. This ensures proper ventilation while protecting your bread from pests. Avoid completely sealed boxes, as they can trap moisture and lead to mold.
5. Budget Considerations
Determine how much you are willing to spend on your DIY bread box project. Prices can range from inexpensive materials to more costly, high-quality woods. If you’re on a tight budget, opt for reclaimed materials or simple designs that require less investment. Remember, creating your own bread box allows you to control costs while still achieving that rustic look.
6. Ease of Assembly
Consider how comfortable you are with DIY projects. Some designs may require more advanced woodworking skills, while others are straightforward and quick to assemble. If you’re a beginner, start with simpler designs to build your confidence before tackling more complex projects. Look for tutorials that include step-by-step instructions.
Pro Tip: Always test the stability of your bread box once completed. A wobbly or unsteady design can lead to accidents or damage to your bread. Place different types of bread inside to ensure it fits well and remains protected.
By taking these factors into account, you can create a DIY bread box that not only enhances your rustic kitchen decor but also serves as functional homemade bread storage. Each decision you make, from size to material, directly impacts the usability and aesthetics of your new kitchen accessory. Happy crafting!
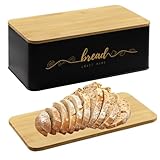
| # | Preview | Product | Price | |
|---|---|---|---|---|
| 1 |

|
KLEE Natural Bamboo Bread Box in Brushed White Finish - Rustic Farmhouse Style, Large Roll Top Bread... | Buy on Amazon |
Last update on 2026-02-27 / Affiliate links / Images from Amazon Product Advertising API
3. Rustic Wire-Basket Bread Box

Looking for a functional yet stylish storage option? A rustic wire-basket bread box blends practicality with farmhouse charm. This design promotes air circulation, keeping your bread fresher for longer. You can line the wire basket with fabric to protect your bread from dust while adding a cozy touch to the aesthetic.
Materials Needed:
– Wire basket (round or rectangular)
– Fabric or burlap (for lining)
– Scissors
– Hot glue gun or fabric pins
Instructions:
1. Choose a wire basket that fits your desired size and shape.
2. Cut the fabric to fit the interior of the basket, leaving some overhang.
3. Secure the fabric in place using a hot glue gun or fabric pins, ensuring it looks smooth and neat.
4. Your rustic wire-basket bread box is ready to hold your favorite loaves!
This style not only serves its purpose but also adds vintage charm to your kitchen decor.
Tips:
Select a fabric that complements your kitchen theme; patterns like gingham or florals can add character!


Last update on 2026-02-27 / Affiliate links / Images from Amazon Product Advertising API
4. Farmhouse-Style Bread Box with Sliding Lid

Want to enhance your kitchen with a touch of farmhouse charm? A bread box with a sliding lid is both functional and stylish. This design features an easy-to-use sliding mechanism, and you can personalize the exterior with paint or wood burning techniques, making it uniquely yours.
Materials Needed:
– Wooden planks (for the box and lid)
– Sliding rails (or wooden dowels)
– Wood screws
– Wood glue
– Paint or wood stain (optional)
Instructions:
1. Cut the wooden planks to size, making sure to measure for a snug fit.
2. Assemble the box using wood screws and glue.
3. Install the sliding rails on the inside of the box to support the lid.
4. Finish the exterior with paint or stain.
This box not only serves its purpose but also elevates your rustic kitchen decor with its beautiful design.
Tips:
Add decorative touches like stenciled words or hand-painted designs for a personal flair!


Last update on 2026-02-27 / Affiliate links / Images from Amazon Product Advertising API
5. Multi-Tiered Bread Box Organizer

Do you love baking a variety of breads? A multi-tiered bread box organizer can help you keep all your loaves neatly stored in one place. This design maximizes space while adding a striking visual element to your kitchen. Each tier can hold different types of bread, making access easy and showcasing your baking skills.
Materials Needed:
– Wooden crates or boxes (varying sizes for tiers)
– Wood screws and glue
– Sandpaper
– Stain or paint (optional)
Instructions:
1. Choose your crates for the tiers, ensuring they’re stable enough for stacking.
2. Sand the surfaces for a smooth finish.
3. Assemble the crates vertically, securing them with wood screws and glue.
4. Finish with paint or stain for a polished look.
This multi-tiered design is both functional and stylish, adding a creative organization element to your rustic kitchen decor.
Tips:
Label each tier with chalkboard paint for easy identification of your delicious creations!


Last update on 2026-02-27 / Affiliate links / Images from Amazon Product Advertising API
6. Vintage Suitcase Bread Box

Looking to add a whimsical touch to your kitchen? A vintage suitcase bread box combines nostalgia with functionality. You can often find old suitcases at thrift stores or garage sales—make sure they are clean and intact. Lining the inside with fabric adds style and protects your bread.
Materials Needed:
– Vintage suitcase
– Fabric for lining
– Craft glue or fabric adhesive
Instructions:
1. Thoroughly clean the inside of the suitcase.
2. Cut the fabric to fit the inside and adhere it using craft glue.
3. Place your bread into the suitcase and close the lid when not in use.
This vintage suitcase not only keeps your bread fresh but also adds a quirky touch to your kitchen decor.
Tips:
Look for suitcases with interesting patterns or colors that complement your kitchen aesthetic!


Last update on 2026-02-27 / Affiliate links / Images from Amazon Product Advertising API
7. Simple DIY Bread Box with a Handle

Searching for a quick and easy craft project? A simple DIY bread box with a handle is just the ticket. This straightforward design can be completed in just a few hours, making it perfect for beginners. The handle adds practicality, allowing for easy movement around the kitchen, and you can customize the finish to match your decor.
Materials Needed:
– Wooden box (store-bought or homemade)
– Handle (metal or wooden)
– Sandpaper
– Paint or stain (optional)
Instructions:
1. Sand the wooden box to ensure a smooth finish.
2. Securely attach a handle to the top of the box.
3. Finish with paint or stain if desired.
This simple yet effective design not only stores your bread but also adds rustic charm to your kitchen.
Tips:
Choose a fun paint color or a natural wood finish to highlight the craftsmanship!


Last update on 2026-02-27 / Affiliate links / Images from Amazon Product Advertising API
8. Personalized Engraved Bread Box

Want to create a bread box that reflects your personal style? Engraving a special message or design can enhance the aesthetic of your kitchen while adding sentimental value. You can use a wood burner for a rustic effect or hire a service for intricate designs.
Materials Needed:
– Wooden bread box (plain or pre-made)
– Wood burner or engraving service
– Sandpaper
– Finish (optional)
Instructions:
1. Sand the box to ensure a smooth surface.
2. Decide on the message or design to engrave.
3. Use a wood burner to carefully engrave your design onto the wood.
4. Finish with a coat of protective sealant if desired.
This personalized touch makes your bread box a cherished piece in your kitchen decor.
Tips:
Keep your design simple for the best results, especially if you’re a beginner!


Last update on 2026-02-27 / Affiliate links / Images from Amazon Product Advertising API
9. Rustic Bread Box with Decorative Lid

Looking to add a touch of creativity to your kitchen storage? A rustic bread box with a decorative lid lets you showcase your style while ensuring practicality. You can use materials like reclaimed wood, fabric, or metal to craft a stunning lid that catches the eye.
Materials Needed:
– Wooden box (pre-made or DIY)
– Decorative materials (fabric, paint, or patterned wood)
– Hinges (for the lid)
Instructions:
1. Create or purchase a wooden box for storage.
2. Design a lid using decorative materials that suit your style.
3. Attach the lid using hinges for easy access.
The decorative lid enhances your kitchen decor while serving its practical purpose efficiently.
Tips:
Select materials that complement your overall kitchen aesthetic for a cohesive look!
DIY bread box ideas are all about making storage feel personal. A rustic lid turns function into a display, while reclaimed wood keeps your kitchen warm and practical. Start small, gather simple materials, and see your kitchen come alive.


Last update on 2026-02-27 / Affiliate links / Images from Amazon Product Advertising API
10. Bread Box with a Built-In Cutting Board

Want to combine style with functionality in your kitchen? A bread box with a built-in cutting board is the perfect solution. This design is ideal for those who frequently prepare meals featuring fresh bread. The cutting board attaches seamlessly to the top, adding both practicality and visual appeal to your kitchen.
Materials Needed:
– Wooden box (for bread storage)
– Wooden cutting board (store-bought or DIY)
– Hinges (to attach the cutting board)
Instructions:
1. Create or get a wooden box for your bread.
2. Choose a cutting board that fits well on top of the box.
3. Attach the cutting board with hinges, allowing it to lift and rest securely on top of the box.
This dual-purpose design maximizes space while adding a stylish element to your kitchen organization.
Tips:
Ensure the cutting board is made from food-safe materials to keep your bread fresh!
Conclusion

Crafting a DIY bread box adds a personal touch to your kitchen while improving organization.
Whether you choose a simple design or go for something more intricate, each project brings a unique charm to your space.
Explore these ideas, gather your materials, and let your creativity flow in the kitchen!
Frequently Asked Questions
What are the simplest DIY bread box ideas for a rustic farmhouse kitchen?
For diy bread box ideas that fit a rustic farmhouse kitchen, try these quick, budget-friendly options. First, repurpose a vintage wooden crate into a bread box by adding a hinged lid and a simple front label.
Second, convert a small display cabinet or an open-front hutch into bread storage by adding a shallow bread tray and a breathable lid.
Third, build a straightforward wooden box from reclaimed boards, finish with a food-safe oil or wax, and add a rustic handle. These ideas keep bread accessible, look great on the counter, and align with your kitchen organization ideas.
What woods are best for a durable, rustic wooden bread box?
For a long-lasting look, choose pine for a light, easy-to-work option, cedar or oak for more durability, or reclaimed pallet wood for authentic rustic charm. Use food-safe finishes like mineral oil or beeswax. Avoid pressure-treated lumber or any wood sealed with toxic chemicals. A simple design can be sanded smooth and finished with a matte oil to emphasize the grain and fit your rustic kitchen decor.
What tools and materials do I need to start a diy bread box project?
Gather a few basics: measuring tape, a handsaw or power saw, sanding block or sander, drill, wood glue, nails or screws, hinges and a catch or magnet, and a finish such as food-safe oil. For materials, pick sturdy boards, a simple box design, scrap metal hardware if you want a rustic accent, and a breathable liner. This covers easy craft projects and wooden bread box designs to get started.
How should I store bread in a DIY bread box to stay fresh?
To keep bread fresh in your DIY bread box, ensure good ventilation and avoid trapping moisture. Line the interior with a clean cotton cloth or parchment, and don’t use heavy plastic bags. Keep the box in a cool, dry place away from direct sunlight, and avoid placing it near heat or the stove. For longer storage, freeze slices; for daily use, enjoy bread within a few days. This approach aligns with homemade bread storage.
How can I customize a rustic bread box design to fit my kitchen decor?
Yes, you can absolutely tailor a rustic bread box to your space. Consider staining or painting to your color palette, then distress the wood for a weathered look. Swap in farmhouse-style hardware like iron hinges or leather straps, add a chalkboard label for a personal touch, or incorporate reclaimed metal accents. Finish with a coat that highlights the grain and coordinates with your rustic kitchen decor.
Related Topics
diy bread box
rustic kitchen decor
wooden storage
farmhouse style
easy crafts
kitchen organization
homemade bread storage
beginner friendly
upcycled materials
modern rustic
functional decor
quick projects