
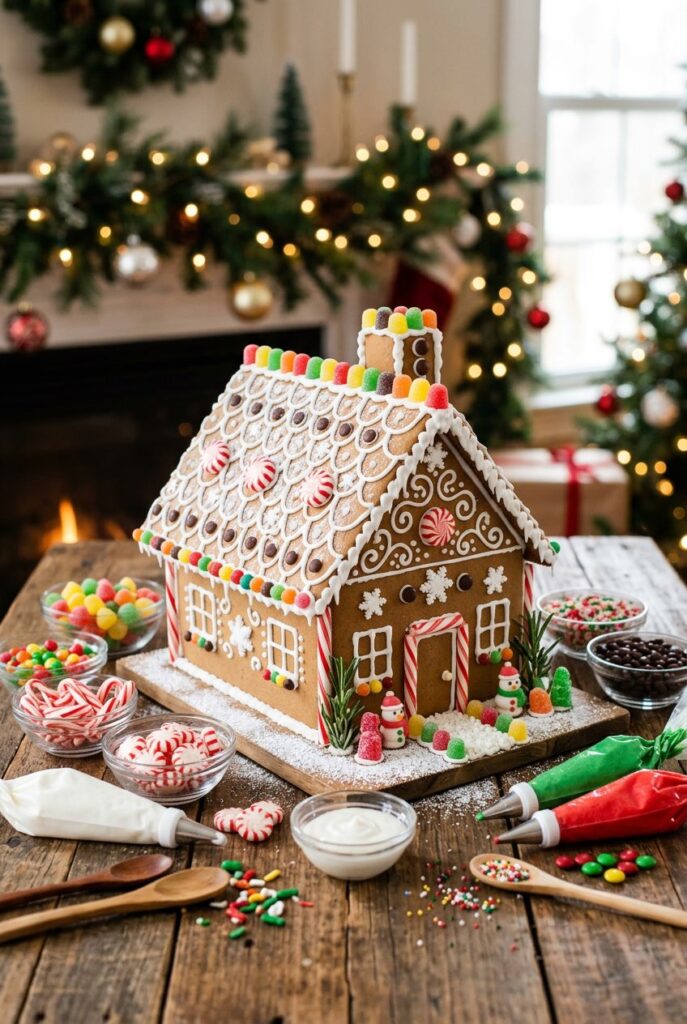
You can make a gingerbread house that looks great and stays standing by keeping decorations simple. Use sturdy icing as glue, and pick a clear theme to guide your candy and color choices.
Start by decorating flat pieces when you can. Choose a strong royal icing to hold everything, and use big candies or fondant shapes for fast, bold impact.
If you want fresh ideas, try mixing things up: a rustic nut-and-seed roof, a bright candy-lollipop facade, or a snowy piped-icing cottage. When working with kids, give them easy jobs like placing large candies and save the detailed piping for a quiet moment (or an adult helper).
Key Takeaways
- Gather a few strong supplies and plan your theme before you start.
- Build with sturdy icing and decorate pieces flat to simplify assembly.
- Use big candies and fondant for fast, eye-catching results.
Essential Tools and Ingredients for Decorating

You need a solid base, reliable icing, and the right tools to make decorating easier. Focus on sturdy panels, thick royal icing, and a handful of handy tools for detail and speed.
Basic Gingerbread House Supplies
Start with a firm gingerbread house dough or grab a store-bought gingerbread kit with baked panels. If you bake, roll the dough evenly so the walls don’t warp.
Use template cutters so your pieces match. Bake until the edges set and let them cool completely before assembly.
Use a flat, food-safe board for your base—wood or heavy cardboard wrapped in foil works. Keep extra candies, sprinkles, and nonperishable decorations nearby in small bowls.
Have spare panels or cookie scraps on hand for repairs. Keep a tub of powdered sugar and a small sifter to adjust icing thickness or dust for snowy effects.
A clean, damp towel makes quick cleanup easier and helps wipe off tips between colors.
Choosing and Using Royal Icing
Royal icing is your gingerbread house glue. Make or buy a stiff royal icing that holds peaks.
Thin a small portion with water for piping outlines, and keep it thicker for structural joints. Test the consistency: stiff for seams, medium for decorations, and flood (thinned) for filling shapes.
Use separate bowls or disposable piping bags for each color to avoid mixing them up. Royal icing dries fast, so work in small batches—just what you’ll use in 15–30 minutes.
If you need to store icing, cover it tightly and refrigerate. Bring it back to room temperature and remix before using.
For assembly, pipe a thick bead along seams and hold panels up with cans or jars until the icing sets. For details like icicles or garlands, use a stiffer icing so the edges stay sharp.
Must-Have Decorating Tools
Piping bags and a set of round and star tips give you plenty of control. A coupler lets you swap tips without changing bags.
Keep at least one small round tip (sizes 1–3) for outlines, and a larger star tip for texture. A small offset spatula or butter knife helps smooth roof icing and spread “snow.”
Toothpicks and a damp paintbrush come in handy for fixing tiny mistakes and pulling icing into shapes. A turntable lets you rotate the house without smudging details.
Scissors help cut piping bags, and zip-top bags make quick color changes a breeze. Soup cans work well to prop panels while seams dry.
If you’re using a gingerbread kit, upgrade it with a better icing bag and tips for finer results.
Gingerbread House Structure and Assembly

Focus on a strong base, secure joints, and the right adhesives for lasting results. Plan piece sizes, let baked pieces cool fully, and use stiff royal icing as your main “glue.”
Classic Designs and Their Foundations
Start with a flat, sturdy base like a wooden board or cake drum to support your house. Measure and cut walls and roof pieces from a template.
Bake pieces until very firm so they don’t warp—usually 25–30 minutes for thicker panels. Assemble using stiff royal icing (with meringue powder or egg whites).
Pipe a thick bead along wall edges, hold each joint for 20–30 seconds, then brace with cans or jars until set. For bigger builds, add internal supports: a folded cardboard brace or a short gingerbread partition can keep walls from bowing.
For roof panels, attach one side first and let it dry for at least 15–30 minutes. Then add the opposite panel.
Reinforce the roof ridge with a generous piped seam of icing. Press roofing material—like slivered almonds or cereal—into the seam while it’s still tacky.
No-Bake and Mini Gingerbread Houses
For no-bake or tiny gingerbread houses, skip the oven. Use graham crackers, wafer cookies, or pre-baked gingerbread panels that snap cleanly.
Cut crackers to size with a sharp knife. Score fold lines gently for cleaner edges.
Use thicker-than-usual royal icing or melted white chocolate as adhesive; both set firm for small builds. Work in stages: assemble walls, let dry, then add the roof.
For mini houses, tweezers or small clips help hold pieces steady. Dry times are shorter—often 10–20 minutes per joint.
Mini gingerbread houses make great place settings or ornaments. Keep decorations light so roofs don’t sag.
If you want edible hills or extra shapes, mold Rice Krispies treats into forms and attach with icing.
Gingerbread House Ornaments
Make tiny gingerbread homes into ornaments by keeping pieces thin and light. Bake small panels (or use crackers) and punch a small hole near the peak before baking or carefully after cooling.
Thread ribbon or twine through the hole and knot. Use fondant, piped icing, or small candies for detail.
Keep ornament glue points small—a dab of royal icing secures a candy chimney or fondant wreath without adding bulk. To preserve an ornament longer, brush on a little food-safe varnish, but label it non-edible if you’re eating other parts.
For hanging, balance weight by putting heavier decorations near the base. You can mount a tiny gingerbread cottage on a flat cardboard circle for a lightweight, display-ready ornament.
Creative Gingerbread House Decorating Ideas

These ideas focus on color, snowy textures, and edible landscapes. Pick a clear color scheme, add snow effects with simple icing, and use candies and cookies to build paths, trees, and village scenes.
Festive Colorful Styles
Choose two to three main colors for a bold look—maybe red, green, and gold, or pastel pink, mint, and white. Use tinted royal icing for roof tiles and window trim so colors stay bright and don’t bleed.
Mix candy types for texture: round peppermints for roof shingles, jelly beans for borders, and small chocolate buttons for shutters. Paint edible gold or silver dust on fondant shapes for shine without extra sugar.
For a coordinated gingerbread village, repeat the color palette across houses. That ties everything together.
Keep small bowls of matching candies nearby so you can quickly replace pieces or fix a roof.
Winter Wonderland and Snow Effects
Create realistic snow with stiff royal icing piped in layers. Use a spatula to build soft drifts on roofs and around the base.
Dust with powdered sugar or edible pearl dust for sparkle. Add icicles by thinning royal icing and letting it drip from eaves.
Freeze small sugar crystals on the icing for extra glint. For fluffy snow, press shredded coconut into sticky icing around trees and paths.
Make a winter scene by placing bottlebrush trees dusted with powdered sugar and small marshmallow snowmen. Arrange several houses with varying snow heights and a central frosted pathway for a Christmas village vibe.
Candy and Cookie Landscapes
Use larger cookies and biscuits to create paths and walls. Graham crackers or cookie tiles make sturdy walkways—glue them with royal icing and edge the paths with mini pretzels or licorice ropes.
Build candy trees from stacked candies or ice cream cones coated in green icing and sprinkles. Place chocolate bar benches and gumdrop bushes to give your scene detail.
Small candies also work as roof shingles or window panes for gingerbread house cookies. For a cohesive village, vary the scale: tiny cookie lamp posts for close-up interest and larger cookie cottages for focal points.
Secure everything with thick royal icing so the display lasts through the season.
Themed Gingerbread House Inspirations

Pick a clear theme, choose matching candies and textures, and plan simple details before you start. Focus on a strong roof idea, a consistent color palette, and small edible accents that tie the theme together.
Rustic and Log Cabin Styles
For a rustic gingerbread house or log cabin, use brown and neutral candies to mimic wood. Attach pretzel rods or chocolate wafer sticks to the walls with royal icing for log siding.
Use graham crackers or gingerbread tiles for a rough, shingled roof look. Add natural accents: shredded coconut for snow, crushed nuts for gravel paths, and cinnamon sticks for porch posts.
Pine needle-look piping and mini gumdrop boulders add texture. Keep colors muted—browns, creams, and green—to keep the cabin feel.
Reinforce corners with extra icing and press candy pieces while the icing is soft. For a compact gingerbread cabin, cut roof overhangs shorter to avoid collapse.
For larger builds, bake thicker panels or use cardboard forms to assemble, then cover with edible pieces.
Barns, Bird Houses, and Unique Builds
Turn common shapes into playful designs like a gingerbread barn, bird house, dog house, or even a gingerbread pickup truck. For a barn, paint a vertical plank look using red-tinted royal icing and add a small hayloft door.
Use white icing to pipe X-brace details on the barn doors. Make a gingerbread bird house by creating a small peaked roof and cutting a round entry hole; line the hole with piped icing or a candy ring.
For a dog house, keep the entry low and add a fondant nameplate. The gingerbread pickup truck uses rectangular panels and candy wheels; stack gingerbread slabs for the bed and secure with thick icing.
Use dowels or stacked cookies as supports for multi-level or vehicle builds. Fondant or modeling chocolate works for small decorative parts like signs, tools, or tiny wreaths.
Small themed displays—mini barns with a truck or bird houses on a fence—look cohesive and fun.
Seasonal and Peppermint Details
Peppermint gingerbread house ideas center on red, white, and mint green. Use peppermint candies or crushed candy canes for roof shingles.
Alternate whole peppermints and striped mints to create bold roof patterns that hold up well with thick royal icing. Add seasonal touches: candy cane columns, licorice window shutters, and white piped icing to mimic snow drifts.
For a wintery scene, sprinkle coarse sugar for icy sparkle and place peppermint stumps as pathway markers. Use green sour strips for garlands and tiny red candies for holly berries.
If you want a modern twist, pair pastel icing with peppermint accents for a pink paradise look. Keep icing colors gel-based to avoid runny textures.
When attaching heavy peppermint pieces, let the joints dry 10–15 minutes before adding more to prevent sagging.
Tips for Decorating with Kids and Beginners

Keep expectations low and focus on fun, safety, and simple steps. Use sturdy bases, edible glue like royal icing, and pre-cut pieces to avoid frustration.
Kid-Friendly Decorating Ideas
Pick candy that’s easy to handle—gumdrops, M&Ms, mini marshmallows, and pretzel sticks work well. Let kids place large pieces first: roof candies, a front door made from a chocolate bar, or a gumdrop pathway.
For mini gingerbread houses, use fewer elements: one candy wreath, a sprinkle roof, and a marshmallow snowman keep things tidy. Give each child a small tray or plate to contain crumbs and loose candy.
Use piping bags with wide tips or zip bags with a corner snipped for simpler icing control. Assign quick tasks like “place five candies” or “make one window” so everyone helps and finishes.
Simple Techniques for Success
Assemble the walls and roof on a flat board. Let the icing set for 20–30 minutes before you start decorating.
Use thick royal icing as “glue.” If it’s too runny, just add powdered sugar until it holds peaks.
Press candy in gently. Heavy pieces like big chocolate bars? You’ll need extra icing to keep those from sliding off.
For a snowy look, dust powdered sugar or press mini marshmallows into wet icing. It’s easy and looks great.
Keep your decorating sessions short—15 to 30 minutes is plenty. Kids stay focused, and nothing gets too soft.
Have a damp cloth and paper towels nearby for quick cleanups. It’s a lifesaver when things get sticky.
Label small bowls of candy so everyone knows what’s what. It speeds up choices and avoids mix-ups.
Using Kits for Easy Assembly
Pick a gingerbread kit with pre-baked pieces and clear instructions if you want a faster setup. Kits usually come with candy, icing mix, and a template—double-check that the icing tube is full and the pieces aren’t cracked before you start.
For a simple gingerbread house, follow the kit’s order: glue the walls, let them set upright on a board, then add the roof. Use extra royal icing from a bag at stress points for a stronger bond.
Kits are perfect when you’re making several mini gingerbread houses for a group. Identical pieces save time and keep things fair for all the kids.
Store leftover candies in labeled bags for touch-ups later. You’ll thank yourself next time.
Building Your Gingerbread Village Showcase

Plan your layout, style, and focal points before you place any houses. Choose a theme, figure out which pieces go front and center, and gather display materials like a baseboard, faux snow, and mini lights.
Arranging Multiple Houses
Put larger structures at the back or in the center to anchor the scene. Try a staggered layout—rows that step down toward the front add depth and let every cottage get its moment.
Leave 2–4 inches between buildings. This gives you room for paths, fences, and tiny trees.
Add a main pathway from the nearest edge to your centerpiece house. Use royal icing or melted sugar to fix houses to the base so they stay put.
Mix up roof heights and colors so nothing looks too uniform. Throw in a chalet with smaller cottages for contrast.
Add little props—benches, lampposts, gumdrop bushes. These guide the eye along your village streets.
Gingerbread House Cottages and Chalets
Design cottages with cozy details: candy cane frames, frosting shutters, gumdrop garden beds. For a chalet, add steep roofs, pretzel trim, and cocoa-dusted “timber” accents to mimic a mountain lodge.
Keep your construction strong. Reinforce corners with extra royal icing and let joints cure for a couple of hours.
Use cardboard or foamboard behind thin walls if you’re building tall chalets. For edible-only builds, layer thicker cookie panels and chill pieces before assembly.
Match your decoration scale to house size. Tiny marshmallow snowmen fit small cottages perfectly.
Larger chalets need bigger accents, like pretzel logs or chocolate roof tiles. You want details that stand out from a distance.
Creating Cohesive Holiday Displays
Pick two or three main colors and repeat them across houses, trees, and paths. Red, white, and evergreen always feel classic for a gingerbread Christmas cottage theme.
Create zones: maybe a village square with a decorated tree, a row of cottages, and a chalet area with higher “mountain” terrain. Use lighting—string LEDs under fondant windows or wrap fairy lights around the base for warmth and focus.
Texture makes a difference. Alternate smooth frosting roofs with sugar-sprinkled snowbanks and cereal-shingled roofs.
Stick with consistent props, like lamp posts or fences, to tie different house styles together. Still, let each gingerbread house keep its own personality.
Frequently Asked Questions

You’ll find tips on icing methods, candy pairings, icing choices, theme building, sturdy materials, and adding lights. Each answer offers steps, product ideas, and quick safety or storage notes you can use right away.
What are some creative techniques for icing a gingerbread house?
Pipe a thick royal icing ridge along the edges to glue pieces together. Keep a damp towel over your bowl so the icing doesn’t crust while you work.
Try different tips for texture: round for smooth lines, star for scallops, grass for thatched roofs. Flood small panels with thinner royal icing, then add piped details after it sets.
Whip air into royal icing for a softer, pipeable texture if you want a buttercream-like look. For strong seams, stick with stiff royal icing straight from the recipe.
Can you suggest unique candy combinations for decorating gingerbread houses?
Use slivered almonds or cinnamon chips as rustic roof shingles. Cereal pieces like Cinnamon Toast Crunch or chocolate wafer bits work great for shingles or tiles.
Line paths with candy-coated sunflower seeds for a tiny light effect. Combine mini marshmallows, pretzel sticks, and chocolate chips to make benches, logs, or fences with lots of texture.
Mix colorful nonpareils or jimmies with fondant accents for bright trim. Pick candies that won’t melt if your display gets warm—skip soft chocolates in a hot room.
What are the best types of icing to use for detailed gingerbread house designs?
Royal icing works best for structure since it dries hard and bonds pieces firmly. Use it full strength for seams and thicker piping that needs to hold its shape.
Thin a bit of royal icing with water to flood panels before you add patterns. For softer, edible decorations, use whipped royal icing (just beat in air) or stabilized buttercream for areas that don’t need to hold weight.
Keep jars of icing at different consistencies: stiff for gluing, medium for piping, thin for flooding.
How can I create a cohesive theme for my gingerbread house decoration?
Pick one clear theme before you start—maybe a winter cottage, fairytale castle, or something spooky. Choose a small color palette and two or three signature materials that fit your theme, like white fondant and silver candies for a wintery look.
Plan a few focal points, such as a lit window or a candy wreath. Repeat shapes and colors throughout the build to tie it all together.
What materials work best for constructing durable and decorative gingerbread house elements?
Use gingerbread dough with little or no leavening and a bit of corn syrup for a harder, flatter cookie. Bake pieces longer than regular cookies so they dry out and stay firm.
Add extra supports with Rice Krispies treats shaped into hills or interior walls for lightweight structure. Fondant works well for molded decorations—it’s pliable and holds its shape better than modeling chocolate most of the time.
For nonedible strength, put cardboard or plastic inside walls and hide it with icing or candy. Sometimes a little cheat makes the whole build last longer.
How can I incorporate lighting into my gingerbread house for added effect?
Try using battery-powered LED micro lights. They won’t generate much heat, so your gingerbread won’t melt or get damaged.
Keep the battery pack outside the house. Thread the wires through a small hole or panel in the back to keep things neat inside.
Want a cozy glow? Place the lights behind sugar windows or translucent candy “stained glass.” It’s a simple way to make the whole house look magical.
Before you finish, test the lights in your display spot. Make sure they don’t touch any edible parts or start melting things—no one wants a sticky disaster.