You want simple, satisfying ideas that match your skill and space.
Whether you decide to create a small 10×10 painting or a larger piece of art choose a theme that is meaningful and enjoyable to you – bold abstract, simple landscapes, playful florals or simple silhouette designs. Easy paint-by-numbers designs will allow you to get started right away.
PICK ONE OF THESE IDEAS Choose one that looks like something you’ll have fun doing. Gather up basic acrylic paints and some brushes. You’ll be ready to hang it on the wall when you’re done.
As you try out a few styles, you’ll pick up core techniques that help your paintings look better fast.
Achieve smaller triumphs through straightforward, incremental projects and later modify the hues and features to fit your individual tastes.
Key Takeaways
- Start with a simple, enjoyable idea and basic supplies to complete a canvas quickly.
- Use a few core techniques to boost the look of any painting.
- Personalize colors and display to make your work feel finished and unique.
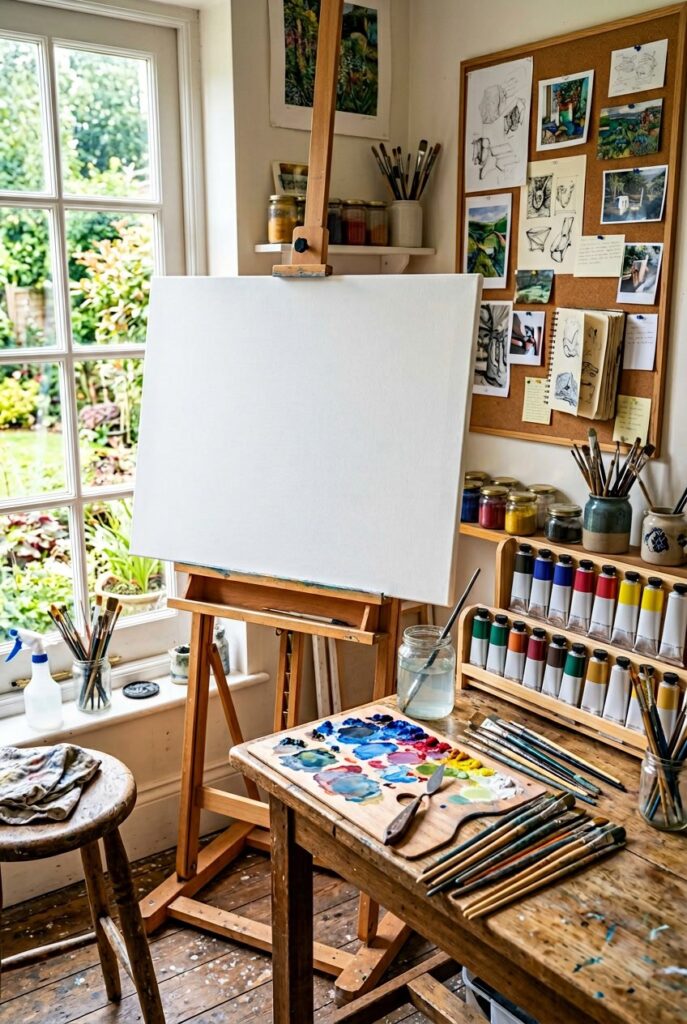
Choosing Your Canvas and Essential Art Supplies

Pick a canvas that matches the size, texture, and durability you want.
Choose brushes, paints, palette knife and easel suitable for your way of working.
Types of Canvas: Stretched, Panels, Boards, and Pads
Stretched canvas is fabric stretched over a wooden frame.
You’ll find cotton or linen options, with rough or smooth surfaces.
Regular Use: Unprimed Canvas Some artists choose to apply their paint to unprimed canvas and have never had a problem. Others may choose to stretch their canvas before applying paint. Use Primed Canvas Recommended if you want your paint to stay on the surface of the canvas and not be sucked in by the fibers.
Frames come in depths like 1/2″ or 1 1/2″; deeper bars look good for gallery-style display.
Canvas panels are canvas glued to a stiff backing.
They lie flat, and don’t warp. Use for painting en plein air or for applying thick layers of paint.
Canvas boards are similar but often cheaper; they’re great for studies and practice.
Canvas pads are sheets of primed canvas bound like a sketchbook.
Use them for quick ideas and plein air work.
If you’re interested in longevity and displaying your artwork long term, I highly recommend that you order a stretched, primed archival canvas.
Must-Have Painting Materials
Start with a basic brush set: flats, rounds, and filberts.
Synthetic brushes work for acrylic; sable or mixed brushes suit oils.
Add small detail brushes (size 0–2) and a larger wash brush (1″–2″).
Buy a palette knife for mixing and applying thick paint or scraping.
I’ve got all the supplies I need to get started! So, let me grab my wooden palette or some disposable palettes, these rags and then this little jar for my solvent or water depending on what paint I’m using.
Pick paints: a starter set of primary colors, plus white and one earth tone, covers most mixes.
Keep primer or gesso if you want to re-prime a blank canvas or adjust the surface.
Varnish protects finished work.
Store paints and brushes upright, and clean brushes after each session to make them last.
Setting Up Your Painting Space
Set your easel where you get steady light, ideally near a north-facing window or under a daylight lamp.
Keep the canvas at eye level to avoid neck strain.
Arrange supplies within arm’s reach: brushes in a jar, palette nearby, paints organized by color.
Use a table or trolley for extra tools like palette knives and varnish.
Protect your table with a drop cloth or paper.
Ventilate if you’re using solvents or varnishes.
Keep a small trash bin and a container for used rags close by.
A clear, organized space lets you focus on painting instead of hunting for tools.
Fundamental Painting Techniques for Canvas

You’ll get a feel for how different paint types behave, the basic steps to build a painting, and which tools shape texture and detail.
Focus on paint choice, a simple workflow, and tools that suit each effect.
Acrylic, Oil, and Watercolor Methods
Acrylic paints dry fast and suit layering and texture.
Use diluted acrylic for washes, thicker acrylic for impasto, and varnish when dry to protect your work.
Acrylics are great for bright colors and quick fixes.
Oil paints dry slowly, so you can blend smoothly right on the canvas.
Work in thin layers (fat over lean) to prevent cracking.
Use turpentine or odorless mineral spirits to thin oils and clean brushes.
Oils give richer transitions and a longer working time for glazing.
Watercolors on canvas need special prep, like a watercolor ground, because regular canvas soaks up paint.
Water-based techniques create soft washes and subtle blends.
You’ll use less pigment, and you can lift mistakes while the paint’s still wet.
Watercolor methods are less common on traditional stretched canvas but work on prepared panels.
Basic Painting Steps for Beginners
Start by choosing the right paint: acrylics for speed, oils for slow blending, or watercolors (but only on prepared surfaces).
Pick a small canvas (8×10 or 11×14) so you can practice without wasting materials.
Prime the canvas with gesso for acrylics and oils; use watercolor ground for watercolors.
Sketch a light composition with pencil or thinned paint.
Block in large shapes and values before adding details.
Work from background to foreground and from thin washes to thicker paint.
Step back often to check shapes and balance.
Finish by adjusting edges, adding highlights, and signing your work.
For acrylics and oils, apply a varnish after the painting cures to protect color.
For oils, you’ll need to wait months before final varnish; for acrylics, two weeks is usually enough.
Exploring Tools: Brushes, Palette Knives, and More
Brush choice changes your marks: flat brushes lay broad strokes, round brushes add lines and details, filberts blend edges.
Synthetic brushes handle acrylics and water-based mixes well; hog bristle suits oil painting and thicker media.
Palette knives spread paint for textured effects and clean edges.
Use knives for acrylic impasto or oil layering.
They also help you mix colors on the palette without soaking brushes.
Other tools: sponges create soft textures and clouds.
Rags lift paint or soften edges.
Masking tape gives crisp lines.
A stay-wet palette keeps acrylics workable longer.
Invest in a basic set of brushes, a palette knife, a jar for solvents or water, and a roll of paper towels—these cover most painting tutorials and techniques you’ll want to try.
Easy Canvas Painting Ideas for Beginners

These ideas focus on simple shapes, clear color choices, and step-by-step layering.
Pick one idea, limit your palette, and work from background to foreground.
Simple Shapes and Color Blocks
Start with basic geometry: circles, squares, triangles, or curved blobs.
Use painter’s tape for crisp edges or freehand big shapes if you want a softer look.
Choose 3–5 colors so you don’t have to stress about complicated mixing.
Try a grid of colored squares, overlapping circles, or a single large shape centered on the canvas.
Use a flat brush for clean fills and a small round brush for touch-ups.
If you want texture, press a dry brush or sponge into wet paint.
Materials to keep handy:
- Acrylic paints in a limited palette
- Flat and round synthetic brushes
- Painter’s tape and a sponge
These ideas help you learn color balance, edge control, and composition.
You’ll build confidence pretty quickly.
Gradient Backgrounds and Silhouettes
Create a smooth color gradient across the canvas as your base.
Blend two or three hues horizontally or vertically using a wide brush and soft, back-and-forth strokes.
Work while the paint’s wet for smoother transitions.
Once dry, add a bold silhouette: a tree line, city skyline, or animal shape in black or a dark color.
Silhouettes hide detail work and make a striking focal point.
For cleaner edges, paint the silhouette on scrap paper first, cut a stencil, and trace it onto the canvas.
Quick tips:
- Use a larger canvas (11×14 or 16×20) for easier blending.
- Blend in sections and wipe excess paint from the brush between passes.
- Step back often to judge the gradient and silhouette balance.
This approach gives you polished-looking canvas paintings with very little drawing skill.
Easy Nature-Inspired Scenes
Pick one simple element: a single flower, a row of hills, or a sunset over water.
Break the scene into layers: sky, middle ground, and foreground.
Paint the sky or background first, then add distant shapes, and finish with closer details.
Examples that work well for beginners:
- Single sunflower: dark center, radiating petals, plain background.
- Rolling hills: three layered curves in different green tones.
- Beach sunset: horizontal bands of warm color with a black palm silhouette.
Limit details and use broad strokes.
Use reference photos or trace a basic outline to transfer shapes.
These easy things to paint on canvas help you build depth and use color without fussing over complex drawing.
Creative and Trendy Painting Ideas on Canvas

Find fresh, modern approaches that work well in small spaces or as large displays.
Each idea below gives clear steps and materials to try, from bold color mixes to tight shapes you can repeat.
Abstract Art and Colorful Swirls
Use flowing, layered color to build movement and mood.
Start with a toned canvas (light gray or beige) to help your colors pop.
Mix acrylics or fluid paints with a pouring medium so they glide.
Pour colors in concentric rings or sweep them with a palette knife to make swirls.
Tilt the canvas to blend edges and let cells form naturally.
Add small details once dry: thin lines with a liner brush or metallic accents for contrast.
Try a galaxy canvas by adding black, deep blue, and white splatters for stars.
Keep one color dominant and use two accents so the painting doesn’t get muddy.
Seal with gloss varnish to enhance depth and protect the surface.
Geometric and Minimalist Designs
Work with simple shapes and a limited palette for a strong visual punch.
Tape clean edges with painter’s tape to create sharp triangles, squares, or abstract color blocks.
Use a ruler and pencil to plan repeating patterns or a single bold focal shape.
Pick 2–4 colors: one neutral, one mid-tone, and one bright accent.
Paint shapes in layers, letting each color dry before adding the next to prevent bleeding.
For texture, apply thick acrylic or use a palette knife on select shapes.
A series of small canvases with the same pattern but different colors makes a modern gallery wall.
Seasonal and Themed Inspirations
Pick motifs tied to seasons or events if you want your work to feel timely or giftable.
For spring, paint loose florals and pastel color washes.
Summer is perfect for bold sunsets, ocean bands, or a galaxy canvas with teal and magenta highlights.
Autumn works well with warm abstracts in layered ochres and burnt sienna.
For themed pieces—like a birthday or nursery—combine geometric blocks with a small figurative element (a silhouette or simple icon).
Use stencils for consistent shapes across multiple canvases.
Adjust scale and color to match the room: larger canvases with muted tones for living rooms, small bright panels for kitchens or shelves.
Step-by-Step Canvas Painting Tutorials

These tutorials give hands-on steps you can follow.
Each one lists tools, basic setup, and the key moves that make the painting work.
Landscape Painting Made Simple
Pick a reference photo and a rectangular canvas size that fits your wall or gallery wall plan.
Lay out three main color mixes: sky, midground, and foreground.
Use a large flat brush for broad washes and a fan or filbert brush for texture.
- Block in the sky first with horizontal strokes, blending from light to dark.
- Add distant shapes (hills, buildings) with thinner paint and muted tones.
- Work toward the foreground with stronger colors and more detail.
Let each thin layer dry, then add sharper edges and highlights.
For trees and grasses, load a filbert or fan brush and press lightly to create texture.
Step back often to check composition and balance.
Final touches? A few highlights, maybe a thin glaze for atmosphere, and your signature—don’t forget that last part.
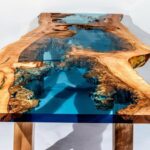
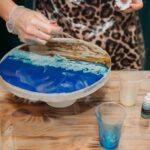
Pour Painting and Drip Art
Set up a protected workspace and clear a flat surface. Gather fluid acrylics, pouring medium, silicone if you want, and some disposable cups.
Mix each color with pouring medium until it flows like warm honey. Don’t rush—getting the consistency right makes everything easier.
Try one of these basic methods:
- Dirty pour: layer colors in a cup, flip it onto the canvas, then lift.
- Swipe: pour colors, then drag a plastic card or cloth across to blend them.
- Drip: use a squeeze bottle or brush handle to drip paint for linear marks.
Tilt the canvas gently to move paint around. Drop in a bit of silicone if you want those cool cells and veins.
Let the piece level out and dry flat for at least 24 hours—sometimes up to 72 if it’s thick. After it dries, seal it with a gloss varnish to make the colors pop and protect your work.
Still Life and Floral Projects
Pick simple objects with clear shapes and some light contrast—maybe a piece of fruit, a vase, or just one bloom. Arrange them with a single light source to get nice shadows and highlights.
Sketch lightly on your canvas to map out proportions. It doesn’t have to be perfect; just enough to guide you.
Block in the big color areas first: start with the background, then the main shapes, then shadows. Build up the form with midtones, and add highlights to make petals or fruit look round.
For flowers, grab a small round or liner brush for petal edges. Use a dry brush for soft transitions.
Pay attention to edges—keep some soft, some crisp. This helps guide the viewer’s eye around the painting.
Use glazing—thin, transparent layers—to tweak color depth if you want a richer look. Add tiny highlights and soft shadow edges at the end to anchor your objects.
Personalizing Your Canvas Art and Display Ideas

Think about how the piece will fit your room, the mood you want, and whether you’ll paint it yourself or use a photo printed on canvas. Pick a clear color palette, size, and spot before you start—this saves time and gets you a more cohesive look.
DIY Canvas Painting for Home Decor
Choose a simple subject that matches your room’s vibe—arches, a single-line face, or a stylized plant are always good. Acrylics dry fast and clean up easily, so they’re a solid choice.
For texture, lay down a base coat, then layer with a palette knife or dry brush. Number your color blocks or sketch shapes on the canvas first to keep things consistent and make painting quicker.
If you want crisp edges, tape the borders before you start and peel it off after the paint dries. It’s a bit fussy, but the results look sharp.
Add a few decorative touches to tie the piece to your decor. Maybe a thin metallic stripe or a muted wash to match your furniture. If you’re more into photos, print a high-res image on canvas and paint over parts of it for a mixed media look.
Creating a Gallery Wall
Start by measuring your wall and sketching a layout on paper. Arrange frames and canvases on the floor first to play with spacing.
Mix up sizes—a few small canvases with one or two big ones feels balanced. Keep at least one thing consistent, like a shared color or matching frames, so it doesn’t look chaotic.
Tape paper templates to the wall to mark nail spots. It’s way easier than guessing and patching holes later.
Use picture hooks for heavier stretched canvases. Lighter, printed-on-canvas panels can hang with adhesive strips.
Hang pieces at eye level—center around 57 to 60 inches high. Leave 2–4 inches between small works, and 4–8 inches around bigger ones.
Displaying Small and Large Canvas Works
Put small canvases on shelves, mantels, or layered in front of bigger works for some depth. Group three to five small ones by color or theme for a tidy cluster.
Easels or plate stands let you move pieces around whenever you feel like it. Large canvases should anchor a room—hang them above a sofa, bed, or console.
Center the canvas over the furniture and leave 6–12 inches between the top of the furniture and the bottom of the canvas. This keeps things looking neat.
If you mix printed and hand-painted works, line up their frames or add matching mats to make it feel intentional. For different heights, use a rail or picture-hanging system so you can adjust without drilling new holes every time.
Frequently Asked Questions

You’ll find ideas for subjects, color choices, beginner techniques, abstract approaches, texture tricks, and quick ways to get started. Each answer has steps or examples you can try right away.
What are some popular themes for canvas painting?
Landscapes—beaches, forests, city skylines—help you practice depth and light.
Still life with fruit, cups, or bottles teaches form and shadows.
Portraits and pets let you work on likeness and skin tones.
Florals and single blooms help with brush control and color mixing.
Abstracts, geometric art, and minimal scenes are great for bold shapes and repeatable series.
Seasonal themes—spring blossoms, summer beaches, fall leaves, winter windows—fit room decor and make nice gifts.
How can I choose a color palette for my canvas artwork?
Start with three main colors plus white. It keeps mixing simple.
Pick one dominant color, one mid-tone, and an accent for harmony.
A limited palette sets a mood: warm (reds, ochres), cool (blues, greens), or high-contrast (blue and orange). Test mixes on scrap before you hit the canvas.
Look at photos or your room’s colors for inspiration. Make small swatches, see what feels right, and decide which lights and darks you need.
What techniques can beginners use to create an impressive canvas painting?
Block in big shapes first, then add midtones and details. Work from general to specific so you don’t get stuck on tiny things too soon.
Try a three-value study—dark, mid, light—to see form quickly. Monochrome portraits are great for practicing value without stressing about color.
Acrylics dry fast for quick layers, but oils blend smoothly if you’ve got patience. Stick to two brush sizes and a palette knife for variety without overwhelm.
Can you suggest ideas for abstract canvas paintings?
Paint a grid of colored squares with gentle value shifts. Layer washes, then add loose marks on top.
Try music-driven shapes—turn a song into bars or wave lines. Or go minimal: one tree or a moon with lots of empty space.
Make a series using one palette, just change the composition each time. Mix in collage paper shapes with paint for bold contrast.
What are some creative ways to use texture in canvas painting?
Use modeling paste or heavy gesso to build up raised areas. Press household stuff—bubble wrap, combs—into wet paste for easy patterns.
A palette knife gives you thick, impasto strokes, especially on petals or waves. Glue down paper or fabric, then paint over it for layered depth.
Drybrush thin streaks for subtle texture, or dab with a sponge for mottled effects. Scrape back paint in spots to reveal underlayers and keep things interesting.
How can I find inspiration for my next canvas painting project?
Pick one clear theme. Maybe a window view, a certain sky, or just a single flower.
Narrowing things down keeps choices simple and helps you finish faster.
Collect photos of light that catch your eye. Pick one that has bold shapes.
Try daily challenges. Paint a mini piece each day, or do seven quick sky studies.
Walk through your rooms and see what kind of art might fit the colors or sizes you need.
Check out your own stuff—shoes, mugs, books. Throw them into strong light and see what stands out.