You don’t need a craft store to be creative. Grab some paper, some jars, some scrap fabric and have fun making paper stars, painting a jar or making a no-sew pillowcase.
If you want something fast, a sensory bottle or a quick collage might do the trick. These projects use what you already have at home and can lead to bigger, bolder ideas later.
Here are some fun ideas for you to try: – Choose a project that matches your current mood – Fall, winter, spring or summer projects for kids and adults – Easy, moderately easy, or a little more challenging, depending on your mood & ability!
You’ll get: Easy to follow steps Affordable materials Options for selling or giving away your finished project (optional)
Key Takeaways
- Start with simple, low-cost supplies to make quick, satisfying crafts.
- Choose projects that match your time and skill, from paper to painted home decor.
- Small crafts can grow into seasonal gifts, family activities, or products to sell.
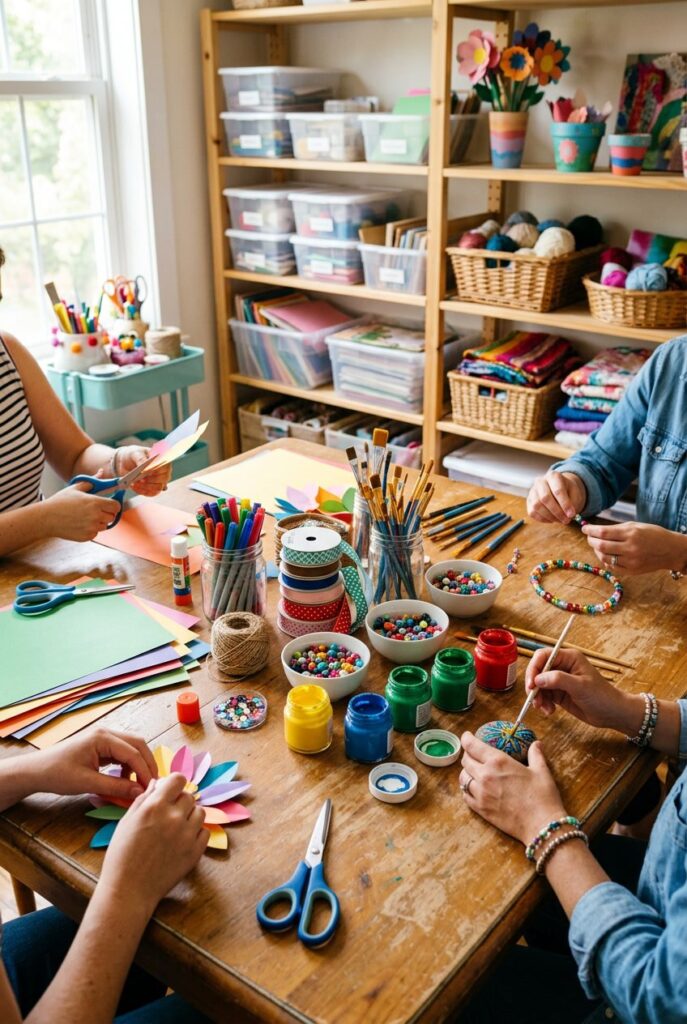
Essential Craft Supplies for Getting Started

You’ll need some tools, some common materials and a place to work. Mostly common materials that will be used over and over.
Basic Materials You Need
Gather white glue (PVA), tacky glue, hot glue gun with glue sticks and fabric glue. We also love to use paper: cardstock, printer paper, scrapbook paper and colored construction paper.
Stuff to always have on hand: Acrylic & watercolor paints along with some assorted brushes (small, medium & large). Black permanent markers, graphite pencils, an eraser & a fine-tip black pen.
Good scissors for cutting paper and better scissors for fabric. A craft knife, self-healing mat and metal ruler are useful too. A tape measure and clear ruler are nice to have as well.
Glue, staples, binder clips, masking tape, painter’s tape, and elastic bands are all considered little extras and staples. Mod Podge or a similar decoupage medium, and basic sealer spray are finishing staples.
Organizing Your Craft Space
Choose a work surface: Your workspace will be whatever surface you can claim for the day. For us short folks a folding table works like a charm. Gather similar supplies into storage bins. Things like paints, papers, and glue should all have their own bins.
Label the bins with adhesive notes so you can easily change them as needed. Attach scissors and rulers to a pegboard or a magnetic strip above your work surface.
Keep everyday tools close. Use desk organizers or mason jars for brushes and markers.
Store paper vertically to keep it from bending. Put paints and liquids on a low shelf to avoid spills. Keep a trash bin and a damp cloth handy for messes.
Affordable Crafting on a Budget
Buy glue sticks, paint sets, and brushes in multipacks to save money. Dollar stores have solid basics like scissors, foam brushes, and bins.
Thrift shops and yard sales surprise you with frames, jars, fabric scraps, or wooden bits to upcycle. Prioritize stuff you’ll use over and over—a glue gun, sewing kit, and paint set beat a one-trick tool.
Reuse household items—mason jars, egg cartons, cereal boxes make great bases. Track what you use most and buy in bulk when you run low. Sign up for newsletters or use coupons to catch deals on better supplies.
Easy and Fun Paper Crafts

Paper, scissors, glue, and a marker—sometimes that’s all you need. Each idea here gives you the basics, a tip or two, and a way to use what you make.
Origami Basics for Beginners
Grab some square paper and try three folds: valley, mountain, and squash. Practice on 15–20 cm origami paper, or just trim regular paper to a square.
Start simple: fold a crane, a boat, or a basic box. These teach you how to reverse folds and keep things crisp.
Take your time. Line up edges and press creases with your nail or a bone folder. Diagrams or short videos help with tricky steps.
Make boxes for gifts, little boats for play, or cranes for decor. Once you’ve got the hang of it, try modular origami to build bigger shapes.
Simple Paper Flowers
Cut petals from tissue, crepe paper, or cardstock for roses, daisies, or peonies. For tissue or crepe, stack 6–8 sheets, cut out petals, twist or fold the base, and glue or tape it.
With cardstock, trace a petal template, cut layers, and glue the centers for a 3D effect. Use a wooden skewer or wire for a stem and wrap it with floral tape.
Cut leaves from green paper to finish your bouquet. Vary petal size and color for depth.
These flowers work as gift toppers, table decor, or a sweet Mother’s Day bouquet.
Creative Paper Collage Art
Collect magazine pages, patterned paper, photos, or old maps. Plan a simple layout: pick a main image, then cut shapes that support it.
Stick with a glue stick for paper layers or use a brush and PVA glue for heavier stuff. Try a theme—nature, abstract, or even a portrait from torn paper bits.
Mix textures: tissue, glossy mag pages, and cardstock add depth. Trim overlaps and press layers flat for a neat finish.
Frame your collage or mount it on foam board. Collages make cool school projects, custom cards, or wall art from leftovers.
Fun Crafts for Kids

There’s something for every age and attention span. These ideas keep kids busy and away from screens—at least for a little while.
Age-Appropriate Craft Projects
Match the craft to the kid’s skills. For toddlers, go simple: handprint cards, chunky puzzles from painted cardboard, or paper plate animals.
Use non-toxic glue sticks and big safety scissors. Preschoolers and early elementary kids can handle salt dough ornaments, toilet paper roll creatures, or fingerprint art.
Let them mix colors and try new textures. Supervise if baking or using anything hot.
Older kids like more detail: popsicle stick frames, easy sewing on felt, or shrink plastic keychains. Give clear steps and let them pick colors or patterns.
Offer holiday options: Christmas ornaments or Halloween paper-mâché pumpkins.
School and Classroom Craft Ideas
Pick projects that fit a 30–45 minute class using cheap supplies. Layered paper collages, bookmarks, or simple origami work for all ages.
Prep materials ahead of time to save class minutes. Group projects build teamwork—a mural where everyone paints a square, or a sculpture from milk cartons and bottle caps.
Tie crafts to lessons: leaf rubbings in fall, egg decorating for Easter, or spooky puppets for Halloween. Keep instructions visual—a one-page step list and a sample piece help a lot.
Add an extra challenge for early finishers, like glitter, labels, or a quick writing prompt.
Screen-Free Boredom Busters
Keep a craft kit ready for “I’m bored.” Fill a box with pipe cleaners, googly eyes, colored paper, string, and markers.
Add idea cards: paper plate masks, sock puppets, rock painting. Offer quick 10–20 minute crafts like origami animals, sticker scenes, or paper spinners.
For longer stretches, try painted rocks, safe slime, or a cardboard town to build and decorate. Holiday kits keep things fresh—throw in templates for ornaments or masks.
Hands-on, focused activities like these cut down on screen time and boost creativity with stuff you already have.
Creative DIY Crafts for Adults

Try something that relaxes your mind and leaves you with something cool or useful. Here’s a few ideas that don’t require a ton of gear.
Therapeutic Watercolor Painting
Watercolor painting soothes the mind and teaches color mixing. Start with a small set of pans (5–12 colors), two brushes (sizes 6 and 10), and 140 lb cold-press paper.
Mix washes on a palette or plate and test colors before jumping in. Begin with wet-on-wet washes for soft backgrounds, then use wet-on-dry for sharp details.
Paint simple things first: a leaf, a jar, or a loose landscape. Focus more on light and dark than perfect lines.
Tape your paper to a board to keep it flat. Lift paint with a damp brush or paper towel for highlights. Work in layers and let each dry—the patience pays off.
Keep a notebook for sketches or color swatches you like.
Jewelry Making at Home
Jewelry making lets you design wearable art and play with tiny tools. Grab pliers (round-nose and flat), wire cutters, a bead mat, and basic supplies: headpins, jump rings, crimp beads, and a mix of beads.
Try stringing beads on cord or wire, wire-wrapping a cabochon, or making looped dangles with headpins. Use jump rings and a clasp to finish bracelets or necklaces.
For earrings, mirror the designs and use skin-safe hooks. Practice making even wire loops on scrap wire.
Work under good light and use a bead mat to keep beads from rolling away. Label your materials and store small findings in little compartments.
If you want to sell or gift your pieces, snap a photo on a plain background.
Upcycled and Recycled Projects
Upcycled crafts turn trash into treasures. Use glass jars, old T-shirts, wine corks, or cardboard.
Turn jars into painted votive holders or desk organizers. Cut T-shirts into strips for braided rugs or tote handles.
Glue wine corks into trivets or bulletin boards. Stack and glue cardboard for shelves, plant stands, or boxes.
Clean and dry everything before you start. Use strong glue like E6000 or a hot glue gun for tough bonds. Sand and prime glass or metal before painting.
Plan your project size and test a small bit first—it saves headaches.
Seasonal and Holiday Craft Ideas

Seasonal crafts give you cheap decor or gifts you’ll actually want to keep. Here are some ideas with easy-to-find materials.
Spring and Summer Craft Projects
Make bright, quick crafts using paper, yarn, or things you find outside. Try folded paper sunflowers: cut cardstock petals, glue them around a painted paper plate, and add a button in the middle.
For spring, make a cotton ball sheep—draw a sheep on cardboard, glue on cotton for the body, and add felt ears and googly eyes.
For summer, wrap mason jars with colorful yarn or twine, glue the seam, and pop in a battery tea light for patio vibes. Try yarn pumpkins with balloons: wrap yarn around a balloon, let it dry, then pop the balloon and add a faux stem.
These projects just need glue, scissors, and leftover yarn or paper.
Fall Decor and Thanksgiving Crafts
Lean into warm colors and natural textures for fall crafts and Thanksgiving projects you’ll want to show off or give away.
Try making yarn pumpkins: blow up a few small balloons, dip yarn in glue, wrap it around, let them dry, and pop the balloon out.
Paint some pinecones with bronze or copper paint, then glue them together on a wooden tray for a quick centerpiece.
Decorate a mason jar, cut slips of paper, and invite everyone to jot down something they’re thankful for each day.
For your door, make a wreath from pipe cleaners or felt—just attach autumn leaves, acorns, and ribbon to a foam ring.
These projects work for both kids and adults and highlight those classic fall shades: deep orange, burgundy, and gold.
Festive Christmas and Holiday Crafts
Pick crafts that double as gifts or tree decorations, and keep the steps simple with a nice finish.
Twist green pipe cleaners into little Christmas tree cones, then add bead “ornaments” for a tiny festive scene.
DIY snow globes are fun—grab small jars, waterproof figurines, distilled water, and a pinch of glitter; seal the lid with waterproof glue.
Cut felt into shapes for ornaments, stitch the edges by hand, and add a touch of stuffing for that soft look.
Layer scrapbook paper into paper stars or fold up some paper ornaments, then loop a ribbon through for hanging.
Finish up most holiday crafts with a clear sealant for durability, and pop on a gift tag if you’re giving them away.
Popular and Unique Fun Craft Projects

You don’t need fancy supplies to make something memorable.
Here are step-by-step ideas, what you’ll need, and a few quick tips to help your crafts turn out great.
Decorating Painted Rocks
Choose smooth, flat rocks and give them a good wash before you begin.
Acrylic paints and fine-tipped brushes work best for details. Start with a base coat, let it dry, then go wild with patterns, faces, or tiny scenes.
Seal your painted rocks with a clear spray or brush-on varnish to help them last.
Try these twists:
- Garden markers: Paint plant names, seal, and stick them on a skewer.
- Story stones: Paint simple images—like a sun or a house—to tell a story.
- Gift stones: Personalize with initials or a short message.
Keep a palette, water cup, and paper towels close. Thin paint layers prevent clumps.
If you mess up, just let the paint dry and paint right over it.
Photo Collage Memories
Pick a theme—family trips, milestones, or maybe a year in review.
Print photos in different sizes or crop them on your phone. Lay them out on a board or canvas before gluing so you can move them around.
Use double-sided tape or Mod Podge to stick them down, then brush on a thin coat of decoupage medium for protection.
Add little extras like ticket stubs, labels, or handwritten captions on cardstock.
For a clean look, space photos evenly or create a grid. For something more relaxed, overlap corners and mix up the orientation.
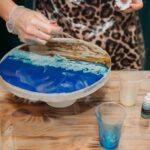
Sensory Bottles and Pressed Flowers
Sensory bottles work well as calm-down tools, while pressed flowers make for lasting decor.
Grab a clear plastic bottle, fill it with distilled water, a splash of glycerin, and toss in beads, glitter, or sequins.
Seal the cap with hot glue. Give it a shake and see how things float—add more glycerin for slower movement.
For pressed flowers, pick dry, flat blooms and press them between paper in a heavy book for a week or two.
Mount your pressed flowers on cardstock or tuck them into glass pendants with clear glue or resin.
Label with the date and place for a nice memory.
You can even float tiny pressed flowers in clear resin to make paperweights or magnets.
Decoupage Techniques for Beginners
Decoupage is all about gluing paper or fabric onto objects for a quick refresh.
Start with a clean surface—wood, glass, or cardboard all work.
Cut or tear images from napkins, magazines, or patterned paper.
Brush on a thin layer of decoupage medium, lay the paper smooth side up, and gently press out bubbles with a soft cloth.
Add 2–3 top coats, sanding lightly between if you want it extra smooth.
Try decoupage on trays, jars, switch covers, or book covers.
If you’re using fabric, mix in some fabric medium with your glue.
Always test a small scrap first to see how it sticks and dries.
Frequently Asked Questions

You probably have plenty at home to start a quick project.
Here are ideas with exact materials, easy steps, and tips for all ages.
What DIY projects can I do at home with minimal supplies?
Paint rocks with acrylic paint and a fine brush. Smooth stones, a base coat, simple patterns, and a clear sealer get you started.
Try friendship bracelets with embroidery floss or yarn. Learn a few basic knots, cut to wrist length plus a little extra, and finish with a knot or clasp.
Paper flowers are easy—use old magazines or tissue paper, cut petal shapes, layer them, and secure with a pipe cleaner or glue.
Which crafts are recommended for beginners to start with?
Collage art is a great place to start. Grab scrap paper, glue, and scissors. No special skills needed, and you’ll get to play with layout and color.
Rock painting or simple watercolor washes teach you about color and brush control—no fancy tools required.
Sew a basic pouch with a needle, thread, and fabric scraps. Straight stitches and a button closure help you build confidence.
What are creative crafting ideas for kids’ activities?
Nature collages are fun—use leaves, twigs, and glue on cardstock. Stick to fallen items, not living plants, and keep an eye on little kids.
Build playhouses or robots from cardboard boxes. Cut windows, add decorations with crayons or paint, and tape or glue flaps for doors.
Sensory crafts like rice bottles work well. Fill a clear bottle with colored rice and tiny toys for a quiet, safe activity.
How can I repurpose everyday household items into crafts?
Turn glass jars into painted storage or candle holders. Clean them, add a coat of primer, then paint or wrap with twine.
Old t-shirts make great braided rugs or tote bags. Cut into strips, braid or knot, and stitch the edges together.
Paint tin cans and turn them into planters. Add drainage holes, and cover sharp edges with tape or fold them under.
What are some easy-to-follow tutorials for handmade gifts?
Knit or crochet a simple scarf with chunky yarn and big needles. Use a garter stitch—just knit every row—until it’s the length you want.
Put together a photo memory jar: print a few photos, tie them with ribbon, and layer in a decorated jar with tissue or confetti.
Homemade candles are surprisingly doable. Melt soy wax, add a wick and fragrance oil, pour into a heat-safe container, and let it cool.
Can you suggest eco-friendly crafting materials for art projects?
Try using recycled paper, cardboard, or old magazines for your collages and paper crafts. These materials cut down on waste and bring in all sorts of textures and colors you might not expect.
When it comes to paint and glue, go for water-based, non-toxic options. If you can, grab natural fibers like cotton or linen—they’re safer, especially if kids are around.
Instead of buying new supplies, dig through your stash for food jars, fabric scraps, or clean plastic containers. Upcycling not only saves you a few bucks, but it also keeps a surprising amount of stuff out of landfills.