Crafting with tissue paper can spark creativity and bring joy to your DIY projects. Whether it’s the vibrant colors or the delicate texture, tissue paper is a fantastic and often overlooked material for crafting. I created this post to share fun, easy, and budget-friendly craft ideas with tissue paper that anyone can try at home.
If you love getting crafty or need new activities for your kids, you’re in the right place. This article is designed for busy parents, teachers, and anyone who enjoys DIY projects without breaking the bank. You’ll find a variety of tissue paper crafts that are simple to make and perfect for all ages. Whether you’re planning a fun afternoon with the kids or looking for unique decorations for your home, these ideas will inspire you.
Get ready to explore 12 craft ideas with tissue paper that are not only enjoyable but also eco-friendly. Each project is designed to be straightforward, requiring minimal supplies and time. You’ll discover how to create stunning items like tissue paper flowers and colorful wall art, which can brighten up any space. Let’s dive into these delightful projects and unleash your creativity!
Key Takeaways
– Easy to Follow: Each craft idea is designed for simplicity, making it perfect even for beginners and kids.
– Budget-Friendly Options: Most projects use inexpensive materials, making them accessible for everyone.
– Eco-Friendly Fun: These crafts promote recycling and upcycling, helping you reduce waste while having fun.
– Variety of Projects: From tissue paper flowers to bookmarks, there’s something for every interest and occasion.
– Creative Learning: These activities offer a great way for kids to learn and develop fine motor skills while enjoying their creative side.
1. Tissue Paper Flowers

Brighten your space with charming tissue paper flowers! These colorful creations add a wonderful touch to any room or gift. Using vibrant shades and a few basic materials, you can craft a bouquet that looks stunning and lasts longer than real flowers.
Start by gathering colorful tissue paper, wire, and scissors. Stack and accordion-fold the sheets, then cut petal shapes on the edges. Secure the center with wire and fluff the petals for a beautiful bloom. These flowers are not just pretty; they’re also a sustainable choice for your decor.
Key steps to create your flowers:
– Choose your favorite tissue paper colors
– Cut and fold to create petal shapes
– Secure with wire and fluff for fullness
– Use as decor or gift embellishments
These lovely flowers will bring a pop of color to your home and make thoughtful gifts for friends and family.


Last update on 2026-02-27 / Affiliate links / Images from Amazon Product Advertising API
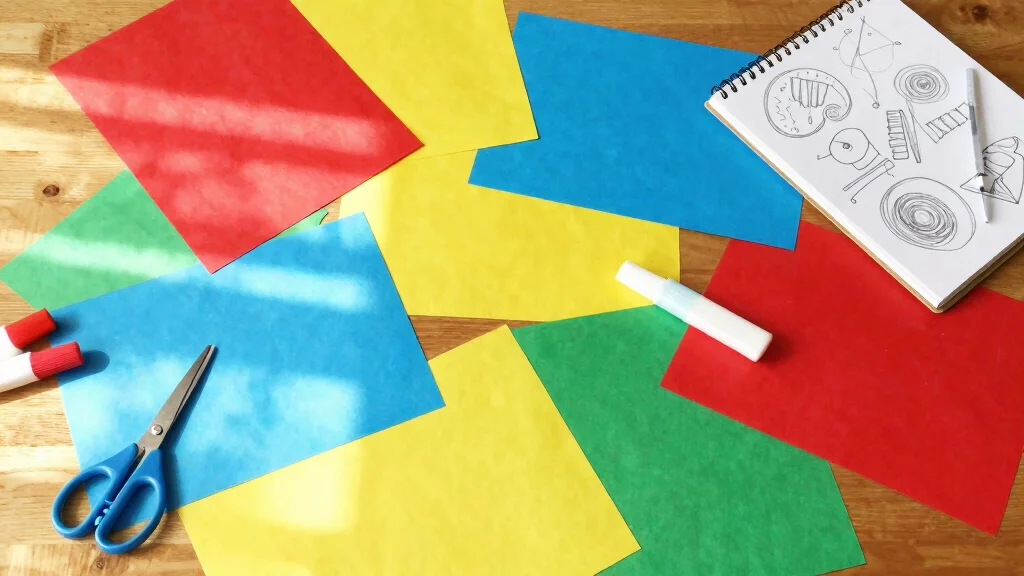
2. DIY Tissue Paper Art

Unleash your creativity with DIY tissue paper art! This fun and simple craft lets you create eye-catching designs to brighten up your walls. With just a few supplies, you can transform tissue paper into stunning artwork that reflects your style.
Start by tearing or cutting the tissue into small pieces. Apply a layer of Mod Podge on a canvas or thick paper, and stick the pieces down in a layered pattern. Finish with a top coat of glue to seal your masterpiece. This project is perfect for using up leftover tissue paper and making something uniquely yours.
Steps to get started on your art:
– Gather tissue paper and a canvas
– Tear or cut paper into small shapes
– Apply Mod Podge and layer pieces
– Seal with glue for a lasting finish
This artistic approach not only decorates your space but also allows you to express your individuality through vibrant colors and designs.


Last update on 2026-02-27 / Affiliate links / Images from Amazon Product Advertising API
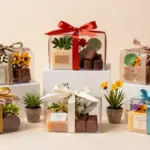
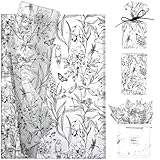
3. Tissue Paper Gift Wrap

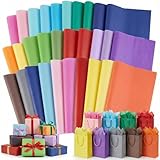
Make your gifts unforgettable with custom tissue paper wrapping! This fun and budget-friendly option elevates your presents, giving them a unique flair. You can easily create a personalized look that shows you care, without spending a fortune.
Layer several sheets of tissue paper in colors that complement your gift. Add fun details like ribbons or twine for an extra touch. Secure the tissue around your gift and finish off with a decorative bow. This wrapping method not only looks beautiful but is eco-friendly, as tissue paper is recyclable.
Steps for wrapping your gifts:
– Choose coordinating tissue paper colors
– Layer and fold around your gift
– Add embellishments like ribbons or twine
– Tie it all together with a bow
Your gifts will stand out beautifully, making them feel extra special and thoughtful.


Last update on 2026-02-27 / Affiliate links / Images from Amazon Product Advertising API
4. Tissue Paper Banners and Garlands

Celebrate every occasion with delightful tissue paper banners and garlands! Perfect for parties, holidays, or just everyday cheer, these decorations add a festive vibe to any space. Making them is simple and allows for endless creativity.
Cut tissue paper into squares or rectangles and fold them in half, creating fringes along the edges. Unfold and string them onto twine or string, spacing them out as you like. You can mix colors to match your theme, and they’re lightweight, making them easy to hang anywhere.
Steps to create your garlands:
– Cut tissue paper into desired shapes
– Create fringes by cutting along edges
– String them onto twine or string
– Hang them up wherever you want
These cheerful decorations are simple to store and can be reused, adding a splash of fun to any celebration!


Last update on 2026-02-27 / Affiliate links / Images from Amazon Product Advertising API
5. Tissue Paper Decoupage

Transform everyday items into beautiful decor with tissue paper decoupage! This creative technique allows you to add vibrant patterns to objects like vases, frames, or furniture. It’s an exciting way to personalize your space while recycling old items.
Choose a clean, dry item to decorate. Tear or cut the tissue paper into fun shapes and use Mod Podge to adhere them to the surface, smoothing out any wrinkles. Once it’s fully covered, apply a top coat of Mod Podge to protect your design.
Steps for successful decoupage:
– Select an item to decorate
– Tear tissue paper into desired shapes
– Use Mod Podge to attach and smooth
– Seal with a final coat for protection
Your newly decorated pieces will not only enhance your decor but also showcase your creativity and resourcefulness.


Last update on 2026-02-27 / Affiliate links / Images from Amazon Product Advertising API
6. Tissue Paper Coasters

Protect your surfaces and add flair with DIY tissue paper coasters! This fun project is easy to tackle and perfect for adding a pop of color to your coffee table. Plus, they make thoughtful gifts for friends and family.
Start with cork coasters or plain tiles. Cut the tissue paper into shapes that fit your coasters, then use Mod Podge to attach them while smoothing out any bubbles. Once dry, seal with another coat of Mod Podge to keep them safe from moisture.
Steps to create your coasters:
– Choose cork coasters or tiles
– Cut tissue paper to fit the base
– Attach with Mod Podge and smooth
– Seal for durability and moisture resistance
Your coasters will be stylish conversation starters, adding a personal touch to your home decor.
Did you know that a simple sheet of tissue paper can protect a surface for years? DIY tissue paper coasters with Mod Podge are under $5 for a set and add color without waste.


Last update on 2026-02-27 / Affiliate links / Images from Amazon Product Advertising API
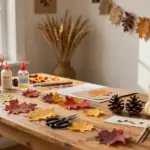
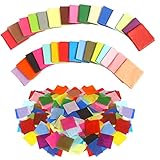
7. Tissue Paper Mosaics

Create eye-catching mosaics with colorful tissue paper pieces! This craft is a fun way to explore colors and patterns while letting your creativity shine. It’s suitable for all ages and can be a great group activity.
Choose a sturdy canvas or paper as your base. Lightly sketch your design with pencil, then tear or cut tissue paper into small squares. Glue them onto your design, filling in the spaces and layering for depth. Once finished, seal your artwork with a clear coat for protection.
Steps to start your mosaic:
– Select your canvas or sturdy paper
– Sketch your design lightly in pencil
– Tear tissue paper into small pieces
– Glue them onto your design and seal
This project is not only engaging but also helps develop fine motor skills for kids while creating something beautiful.

Last update on 2026-02-27 / Affiliate links / Images from Amazon Product Advertising API
8. Tissue Paper Wall Art

Brighten your walls with vibrant tissue paper wall art! This craft allows for limitless creativity and can be tailored to fit any theme or size. It’s a wonderful way to personalize your home decor while making a statement.
Gather a canvas, tissue paper, and glue. Tear the tissue into various sizes and shapes, then apply glue to the canvas and layer the pieces. Create patterns or abstract designs based on your mood and vision. Once complete, hang your work to showcase your creativity!
Steps to create stunning wall art:
– Gather a canvas, tissue paper, and glue
– Tear tissue into assorted sizes
– Apply glue and layer pieces creatively
– Display your artwork for all to see
This simple yet impactful craft will brighten your space and showcase your artistic flair.


Last update on 2026-02-27 / Affiliate links / Images from Amazon Product Advertising API
How To Choose Tissue Paper for Your Crafts
Choosing the right tissue paper for your craft projects can make a big difference. With so many colors, patterns, and types available, it’s essential to know what to look for. Here are some key factors to consider when selecting tissue paper for your DIY tissue paper projects.
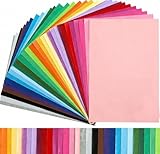
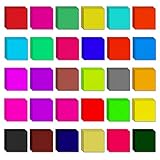
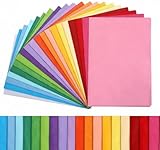
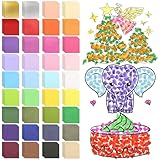
1. Color Selection:
Start by thinking about the colors you need for your project. Tissue paper comes in a rainbow of shades. Consider what will complement your existing materials. For example, if you’re making a birthday decoration, bright and cheerful colors work well. If it’s a more elegant project, opt for pastel shades or metallic finishes.
2. Thickness:
Tissue paper varies in thickness, which affects how it will perform in your crafts. Standard tissue paper is thin and easy to manipulate, while heavier options like crepe paper provide more structure. If you need durability, like for coasters or ornaments, choose a thicker variety. For delicate flowers or lightweight decorations, standard tissue paper is ideal.
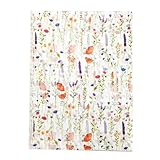
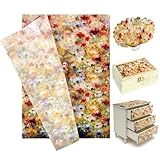
3. Pattern or Print:
Consider whether you want solid colors or patterned tissue paper. Patterns can add visual interest and thematic appeal to your crafts. For example, floral prints are great for spring-themed projects, while geometric patterns suit modern decor. Make sure the pattern aligns with your craft theme and other materials.
4. Eco-Friendliness:
In today’s crafting world, eco-friendly options are gaining popularity. Look for tissue paper made from recycled materials or those that are biodegradable. This choice not only helps the environment but also adds a unique touch to your projects. Always check the packaging for eco-labels when making your selection.
5. Budget:
Tissue paper is generally inexpensive, but prices can vary based on quality and design. Determine your budget before shopping. If you’re planning multiple projects, buying in bulk can save money. Check local craft stores or online retailers for the best deals. Sometimes, you can find sales or discounts, especially during holidays.
6. Accessibility:
Consider how easy it is to find the tissue paper you want. Some specialty colors or patterns might only be available in certain stores or online. Make sure to choose options that you can easily restock in case you need more for your projects.
Pro Tip: Always grab a few extra sheets of your chosen tissue paper. Crafts can be unpredictable, and having a little extra can save you from last-minute runs to the store.
Selecting the right tissue paper is crucial to the success of your craft projects. By considering color, thickness, patterns, eco-friendliness, budget, and accessibility, you can make informed choices. This will enhance your DIY tissue paper projects and ensure you create beautiful, lasting crafts that you enjoy making!

Last update on 2026-02-27 / Affiliate links / Images from Amazon Product Advertising API
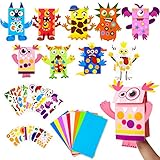
9. Tissue Paper Puppets

Bring stories to life with fun tissue paper puppets! This engaging craft is perfect for kids and encourages imaginative play and storytelling. It’s a great way to craft together while fostering creativity.
Start with a wooden stick or straw for your puppet’s handle. Cut shapes from tissue paper for the head, body, and clothing. Glue the pieces onto the stick, adding googly eyes or yarn for hair if you like! Once your puppet is ready, host a puppet show to share your creation.
Steps to make your puppets:
– Gather wooden sticks or straws
– Cut tissue paper into puppet shapes
– Glue pieces onto the stick
– Add fun details and perform
This activity not only sparks imagination but also provides a wonderful way to bond over stories and performances.
Turn storytelling into hands-on fun with tissue paper puppets. Kids love simple materials, and a quick puppet show sparks imagination and language skills. Pro tip: batch-cut shapes ahead to keep craft ideas with tissue paper easy and budget-friendly.

Last update on 2026-02-27 / Affiliate links / Images from Amazon Product Advertising API
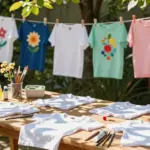
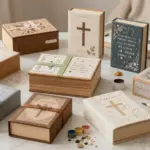
10. Tissue Paper Notebooks

Customize your notebooks with beautiful tissue paper covers! This easy DIY project is a fantastic way to express your style while giving new life to plain notebooks. It’s a thoughtful gift idea for friends who love to jot down their thoughts.
Take a blank notebook and cut tissue paper to fit the cover. Use Mod Podge to adhere the tissue, smoothing out wrinkles as you go. You can layer different colors for a unique look or stick with a single bright design. Once dry, your notebook will be both beautiful and functional!
Steps to create your custom notebooks:
– Select a plain notebook and tissue paper
– Cut tissue to fit the cover
– Adhere with Mod Podge and smooth
– Enjoy your personalized notebook
Your stylish notebooks will make journaling or note-taking a more enjoyable experience!
Did you know that a single sheet of tissue paper can be layered to create 3 distinct notebook covers? These craft ideas with tissue paper let you customize on a budget and reduce waste—give your notes a colorful, eco-friendly upgrade.
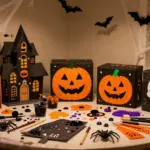
11. Tissue Paper Christmas Ornaments

Add a personal touch to your holiday decor with handmade tissue paper ornaments! These simple crafts can brighten your Christmas tree while creating cherished memories. They’re fun to make and a great way to involve the whole family in festive activities.
Cut tissue paper into festive shapes like stars or circles. Layer different colors for added charm, then use a needle and thread to create a loop for hanging. Consider adding glitter for some sparkle! These ornaments not only enhance your tree but also become special keepsakes for years to come.
Steps to craft your ornaments:
– Cut tissue paper into holiday shapes
– Layer colors for a festive look
– Create hanging loops with thread
– Decorate with glitter for extra flair
These lovely ornaments will bring warmth and joy to your holiday celebrations!
12. Tissue Paper Bookmarks

Make reading even more enjoyable with colorful tissue paper bookmarks! This simple craft is perfect for utilizing leftover tissue scraps while adding a personal touch to your reading materials. They also make wonderful gifts for book lovers.
Cut strips of tissue paper in various sizes and layer them for a unique look. Feel free to decorate with stickers or drawings. Laminate your bookmarks for durability, and you’ll have beautiful, personalized companions for your reading adventures!
Steps to create your bookmarks:
– Cut tissue paper into bookmark strips
– Layer and decorate as desired
– Laminate for added longevity
– Gift them to fellow readers
Your bookmarks will make reading a bit more special and thoughtful!
Conclusion

Crafting with tissue paper opens up a world of creativity that’s both fun and budget-friendly.
From whimsical flowers to stunning wall art, there’s something for everyone to enjoy. Plus, these eco-friendly projects allow you to reuse materials while expressing your artistic side. So gather your supplies and let the crafting adventures begin! We’d love to see your creations—share your favorites with us!
Frequently Asked Questions
What are the easiest craft ideas with tissue paper that are budget-friendly and kid-friendly?
Great starter ideas include craft ideas with tissue paper like tissue paper pom-poms, simple flowers, and colorful collages. They’re classic tissue paper crafts that deliver big results on a budget-friendly crafts budget and are perfect for kids craft activities. Quick tips: tear or cut tissue into squares, layer on a backing for a bold mosaic, or bunch several sheets, tie in the middle, and fluff to make pom-poms. For a quick upgrade, press strips onto clear contact paper to create a stained-glass look, then frame or hang. These ideas cover easy craft ideas and can be used as decorations or gifts.
How can I make eco-friendly tissue paper crafts using common supplies at home?
Keep it eco-friendly by using scraps from gift wrap, old crafts, and plain tissue paper you already have. This approach fits eco-friendly tissue paper crafts and DIY tissue paper projects. Skip glitter and harsh adhesives; opt for non-toxic glue or a glue stick, and back designs with reused cardboard or sturdy paper. Try a garland from scraps, a mosaic on a saved poster board, or a stained-glass look with clear contact paper. Reuse jars and containers as display bases to extend the life of your creations. These steps keep things budget-friendly crafts without sacrificing style.
What basic supplies do I need for DIY tissue paper projects?
Keep it simple: for DIY tissue paper projects, gather tissue paper sheets or scraps, kid-safe scissors, glue sticks or light Mod Podge, clear tape, string or ribbon for hanging, and a sturdy backing like cardboard. Optional items include markers, a hole punch, and a stapler. Pick a cohesive color palette to make your tissue paper crafts pop and you’ll be ready for easy craft ideas that come together quickly.
Are these easy craft ideas suitable for kids’ craft activities and party decorations?
Absolutely. These easy craft ideas with tissue paper are perfect for kids craft activities and can double as festive party decorations. Start with pre-cut shapes or safe tearing for little hands, then let kids layer colors to build flowers, garlands, or pom-poms. For quick party decor, string pompoms into a garland or attach flowers to a balloon bouquet. It’s bright, budget-friendly, and great for classroom or home celebrations.
Can tissue paper crafts be used as home decor or gifts, and how can I customize them?
Yes! Tissue paper crafts translate into charming home decor or thoughtful gifts. Create wall art with a color mosaic, a delicate tissue-paper bouquet, or a decorative lantern. Match color palettes to your space or the recipient, and top wrapped gifts with a handmade tissue paper flower or add a small keepsake. Customize by mixing shades in a color family, adding a touch of metallic accents, or pairing with a simple handwritten tag. These budget-friendly crafts and DIY tissue paper projects let you turn ideas from the article into real decor or gifts.
Related Topics
tissue paper crafts
budget-friendly crafts
kids craft activities
DIY tissue paper projects
easy craft ideas
eco-friendly crafts
simple techniques
crafts for beginners
creative reuse
affordable DIY
seasonal decor
quick crafts